|
For a holiday table, I prefer centerpieces that are simple, natural, and as close to effortless as possible. A few days ago, I was browsing my local Michael’s craft store and came across their clear glass ornament section (the ones you can decorate any way you wish) and I thought to myself those skinny disc versions would make really cute bud vases on a table top. And they do. :)
This project is not sponsored, but I did find all the supplies at Michaels. I brought six disc glass ornaments in addition to a long wood pallet plaque I found in the wood section of the store. Note, the wood plaques are marketed as sign makers and they have a piece of twine on the back but I clipped that off. To make this simple ornament vase centerpiece, you’ll need the following: rectangular wood pallet plaque, six disc glass ornaments, gold spray paint & painter’s tape; hot glue & glue gun, six votive candleholders and tea lights.
First, spray paint the bottoms of the vases gold. I did so by taping them off at a diagonal, then giving them a light coat of gold leaf spray paint (Krylon’s Gold Leaf has always been a favorite).
Once the vases are dry, position the tea lights on your plank to give you an idea where the votive candleholders will sit.
Using the hot glue gun, dab a small pea sized amount on the bottom of a vase then secure it to your plank. I tilted mine slightly off center and varied the angles for a less predictable layout.
Fill the vases with fresh cut stems for a vibrant and natural autumn display. I did not use any water in these vases. You could, but I’d caution you to use only a few tablespoons, and you’ll have to use a funnel or basting tool to fill their smaller openings. I reasoned that the centerpiece is only on the table for a few hours at the most so water wasn’t necessary for a temporary setup.
This idea works just as well for a Christmas table too, simply substitute evergreens for autumn leaves.
Having the vases and candle holders all set on one board makes the centerpiece easily moveable before and after your meal. :)
There’s no need to store the centerpiece as created. The vases will pop off the wood plank, but be careful doing it, I broke one because I tried to do it too quickly. Just bend and nudge them gently and the ornaments will pop off the board. If you remember to keep the tops, you can reuse them as decorations on your tree. You can also carefully remove the hot glue from the wood board with the tip of a butter knife, and repurpose the wood plank. I’ll be using mine as an everyday planter base, the wood adds nice contrast and warmth to my collection of white potted plants.
More holiday ideas coming soon! . from https://centsationalstyle.com/2018/10/diy-ornament-vases/
0 Comments
Weekend hellos! I’m headed back to California today after a quick visit to Salt Lake City, my sister and I had fun playing outdoors and making a day trip to Park City, Utah. The weather has been so beautiful with blue skies and skylines peppered with trees showing off autumn colors. I came at the perfect time! I’m ready to dive into the holiday season, there’s something about all the stores hanging greenery and twinkle lights that makes me want to start too, although I usually start small with touches of silver and gold as Thanksgiving approaches then decorate more when December is near. Favorite links from the week…
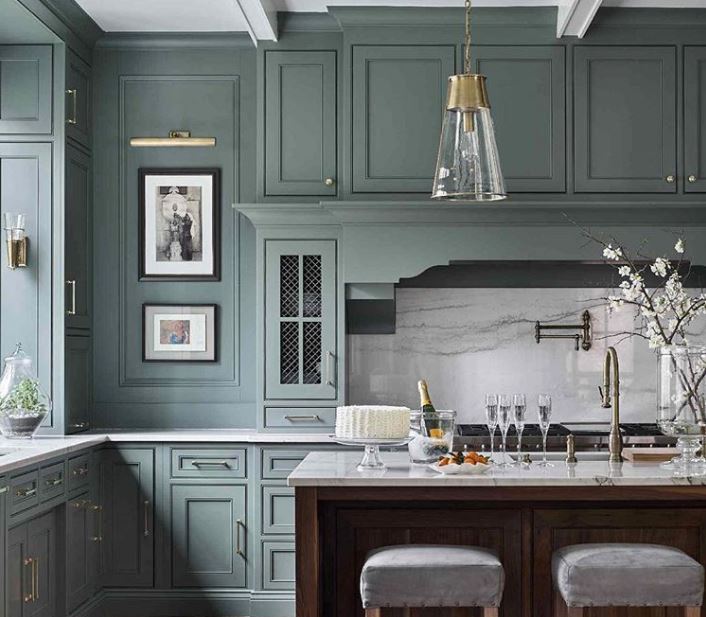
This is a stunning shade of green on these kitchen cabinets. So serene: this Scandinavian family home. Love this cozy medley of color in this NYC holiday house.. This is a cute DIY faux pumpkin idea. Napkin folding ideas for your Thanksgiving table. Another great high/low – styled for the holidays. Maybe you’re not meant to “get through” this phase of life. Random acts of kindness to practice during the holiday season. Have a great weekend. :)
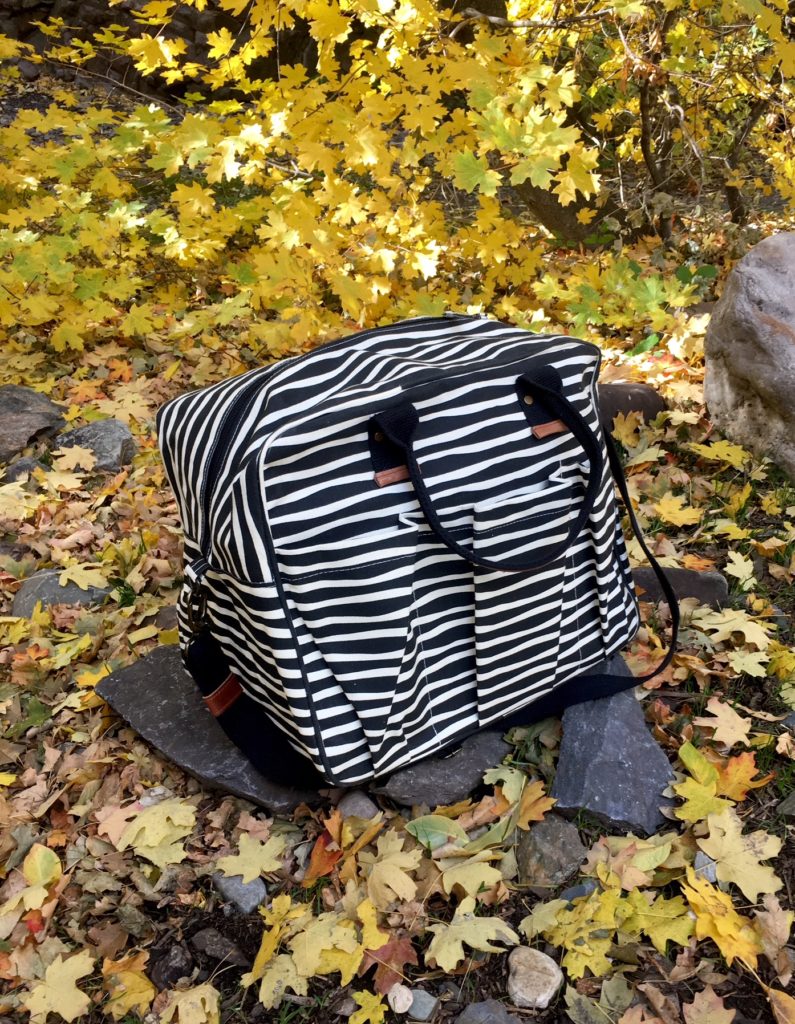
from https://centsationalstyle.com/2018/10/weekend-reading-173/ Yesterday I hopped on a plane to visit my sister in Salt Lake City for a few days. With me I brought a new weekender bag – it’s my new favorite travel accessory! In the past, I’ve traveled with a tote bag or computer bag as my “personal item” but never a weekender. I can’t believe it’s taken me so long to get one, it’s slightly larger than a tote bag and the perfect size for a quick getaway or a carry on.
I prefer canvas as a material since it’s durable and washable. This one is has a flat bottom and is the perfect size for stuffing under the plane seat in front of me.
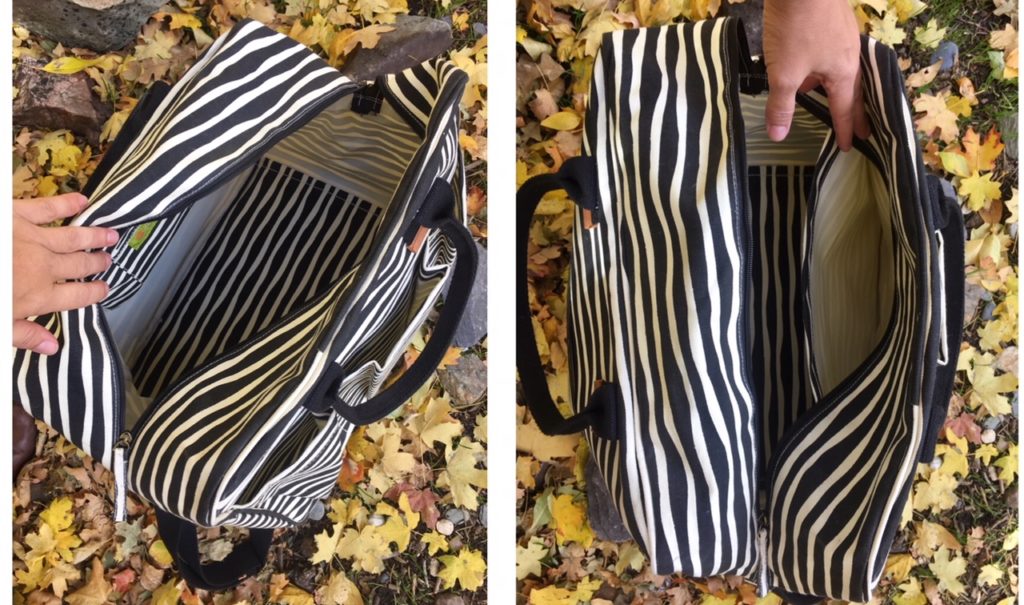
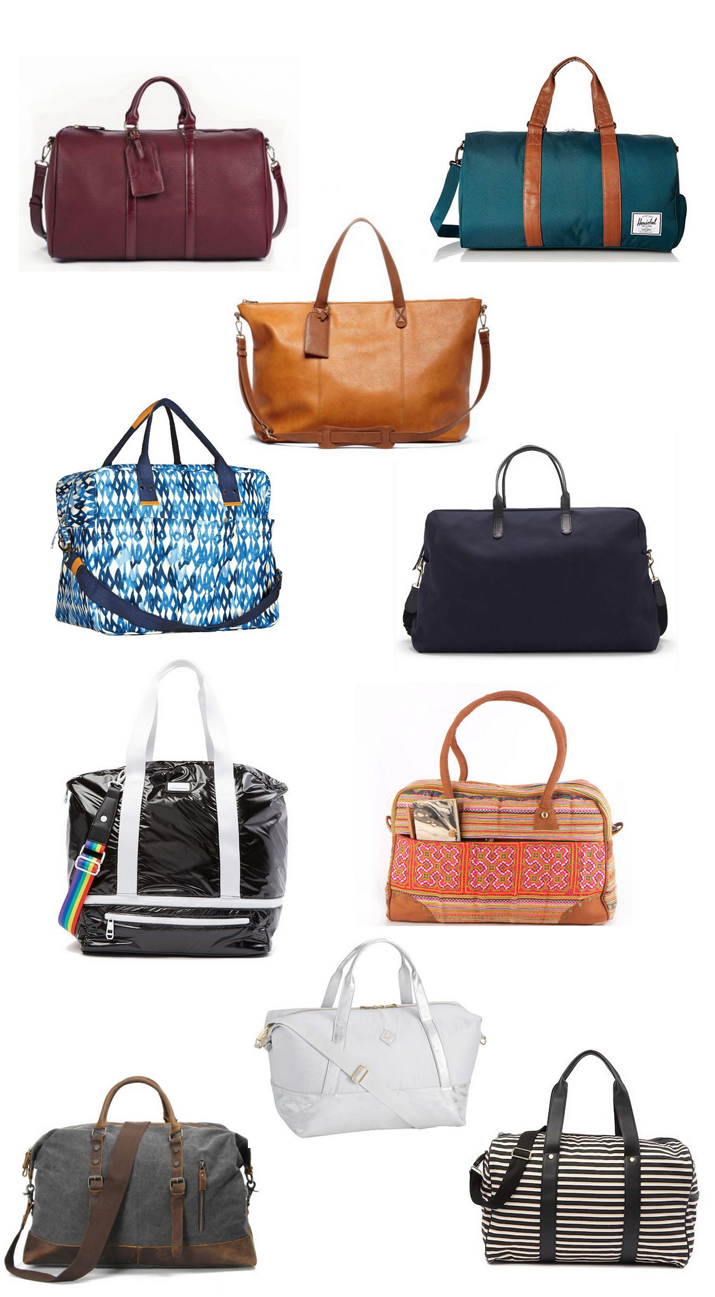
The perfect carry on weekender bag has a compartment for my laptop, space for toiletries and a spare set of clothing, and also a flap that attaches to the suitcase handle and sits on top for rolling through the airport. I love this bag so much I just had to share. It comes in several patterns, but I also rounded up several more stylish weekender bags.
vegan leather bordeaux / herschel weekender (multiple colors) candice vegan leather (more colors) watery blue / navy canvas and leather silver duffle / grey washed canvas / black & white stripe . I’m also shopping for a new suitcase, right now I use a rolling Swiss Gear expandable carry on for domestic travel (I usually check it for international travel), but it’s showing signs of wear and tear so I’m thinking of choosing the hard case style for my next suitcase. Opinions? Do you have a favorite suitcase that you swear by? Do you prefer the soft side or hard side style for travel? from https://centsationalstyle.com/2018/10/weekender-bags-for-travel/ My children love dressing up and Halloween is the perfect excuse to hold a little party for them!
Each year we’ve done this and the excitement of the build up and run up to Halloween is so very lovely to see.
The children like to choose their own outfits and I get to choose all the gorgeous party items and decorations.
So what have we chosen this year? In this case, I decided to go with the Spooky Halloween range. Despite the name, this range is packed full of gorgeous colours and cute little Halloween critters that the kids love. Of course, anything else we needed came straight from Party Pieces who have everything for Halloween covered! Scene setting decorations, spooky tableware and they’ve even got party games covered! Great for keeping the kids happy!
Tiggy and Pip as you can see from the pictures had a great time opening the items and Tiggy even insisted on dressing the cake stand herself and was so very proud of her efforts!
I’m so excited to see the children’s excitement for Halloween, I know it’s going to look amazing and be absolutely perfect!
The post Preparing for Halloween appeared first on Party Pieces Blog & Inspiration. from https://blog.partypieces.co.uk/uncategorized/preparing-for-halloween/ I’m headed to Mexico next weekend for a girl cousin get together, and whenever I travel I always like to bring home a small souvenir. I was considering bringing home a Mexican blanket to add pattern as a cover for a light sofa. Mexican blankets are known as serapes (or serepes), saltillos, or falsa blankets. This textile that’s been around for hundreds of years. Saltillo is the capital of the Mexican state of Coahuila and they remain famous for these multi-colored woven blankets. Serapes refers to the weaving term “serapes” that makes up the banded colorful Mexican blanket design of today. Traditionally, the largest stripe is the primary color and repeated throughout weave, along with complementary colors. Serapes include a darker base of black or brown or gray paired with stripes of brighter oranges, pinks, blues, greens, and a variety of vibrant colors, however they are also available in tone on tone patterns as well. Saltillo serapes were ideally suited for horseback wear. In the 18th century, the Saltillo serape was worn as a poncho and served as a sign of position for Mexican landowners. By the late 19th century, the serape became a national symbol of Mexico and was worn by rich and poor. The blankets are hand-woven and the ends are usually fringed.
Serapes are available in neutral or colorful patterns, they’re lightweight and washable so they make the perfect outdoor accessory for chilly fall evenings or a day at the beach. In their original incarnation, serapes were used as an inexpensive garment outdoors, as a poncho or wrapped around the body like a shawl. In modern times, Mexican serapes are as versatile outside as they are inside, and are handy for any kind of outdoor activity.
With their eye-catching colors, serapes can be used as any other fabric for home decor to add color or that well traveled look: think slipcovers, tablecloths, and pillows for your sofa. Add one to your textile collection… burgundy & black / pink & gray lagoon bright blue / tan & gray
Remember last year when I made pillows out of cotton rugs? Do the very same thing with serapes to make textured pillows for a unique accent for your sofa or bedroom.
Sources for Mexican Blankets: from https://centsationalstyle.com/2018/10/textile-spotlight-serapes/ Hello friends and happy fall weekend! Today is the celebration of life party for my dear friend Karin who I lost two months ago. Ordinarily, end of life services make me sad but today I’m energized and prepared to celebrate her life, her beauty, the way she lived, and the impact she had on so many lives. Also I’m feeling a little apprehensive and nervous about a big decision – I’ve decided to rent a design studio to expand the blog and my business. For months, I’ve felt like a plant that’s outgrown my container and I’m in need of a bigger space in which to grow. It’s a risk and will take a leap of faith, but I feel ready for a new level of growth and have dreamed of a space that would bring out that creative side that’s been dormant for some time. It’s an investment in myself and I’m just going to go for it, I’ll have more details to share in the coming months. Meanwhile, some favorite links from the week…. This modern shower with a custom glass roof is stunning. A very pretty Toronto home renovation. This townhome is decorated rather well considering it all came from West Elm. ;) I want to try a DIY version of this bulky yarn basket project. Another great DIY furniture project: this twin sleeper chair. So festive and fun for the upcoming season: DIY eggnog soy candles. What happens to your body when you stop drinking alcohol. 30 ideas for romantic trips to take with your significant other. .
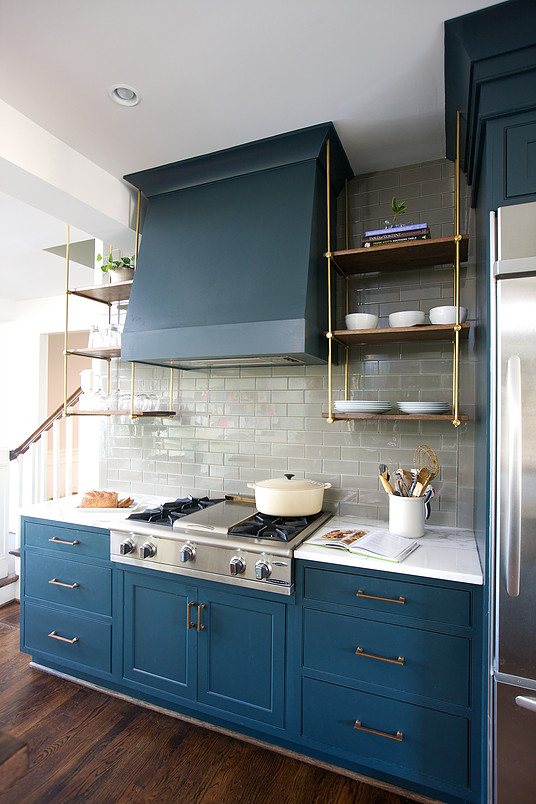
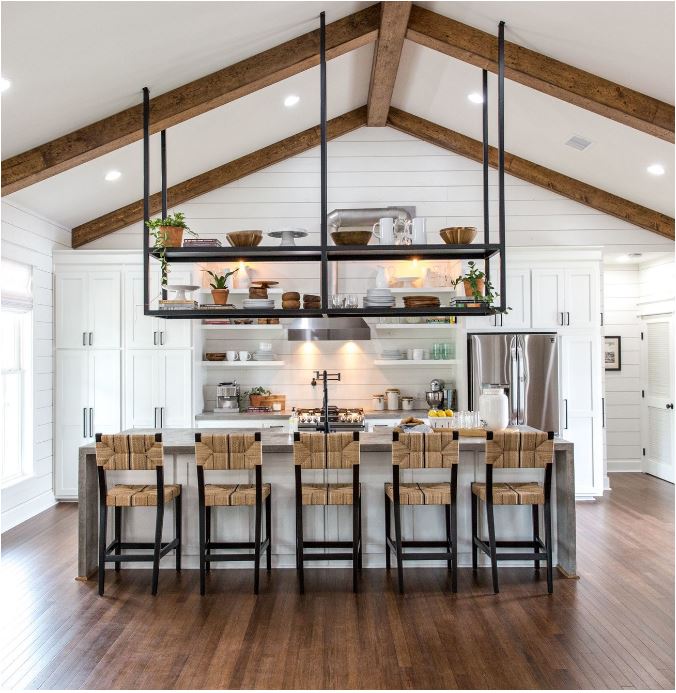
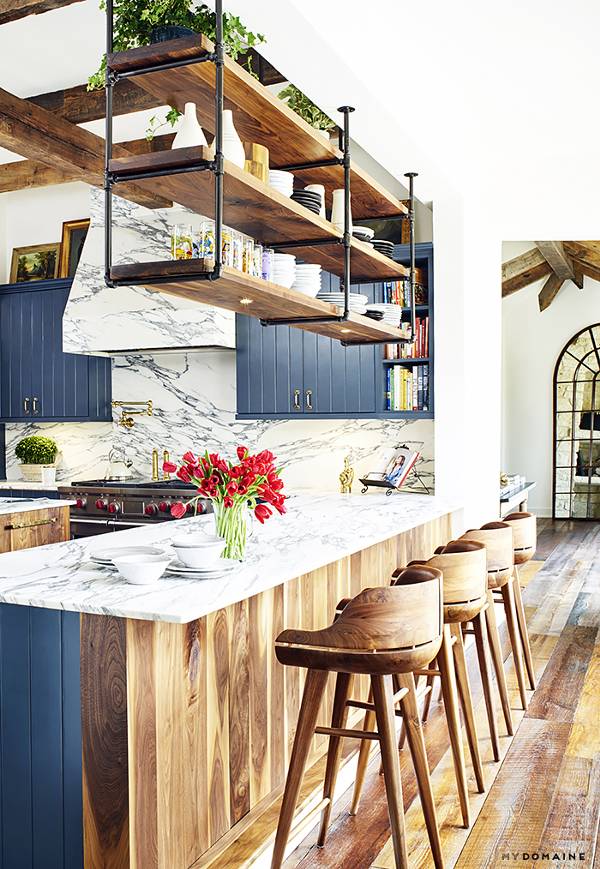
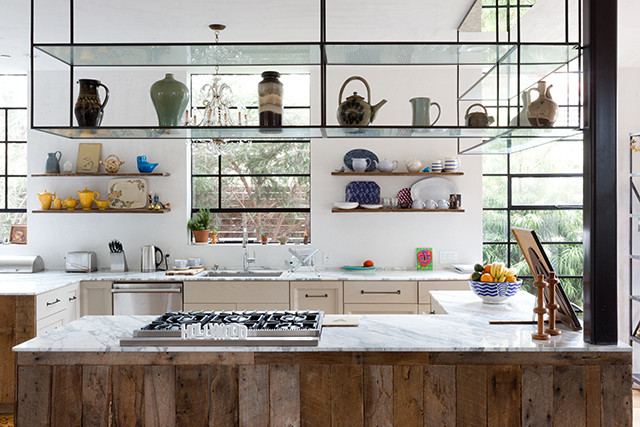
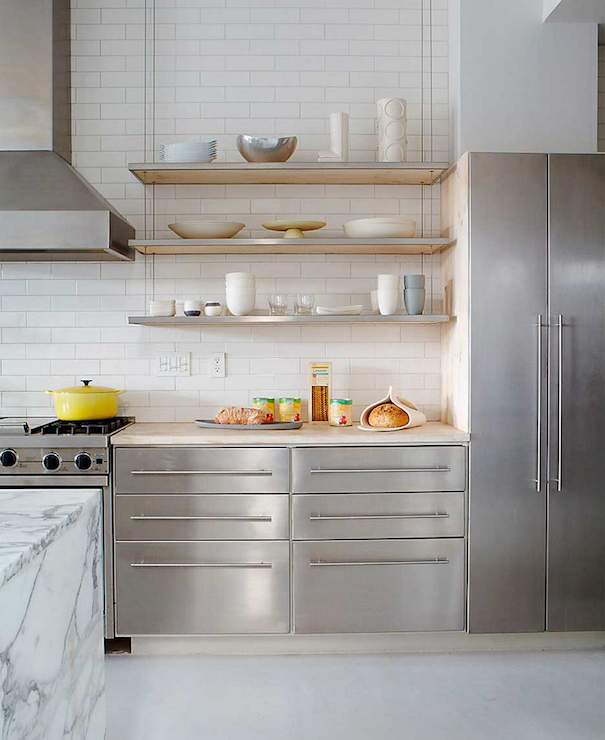
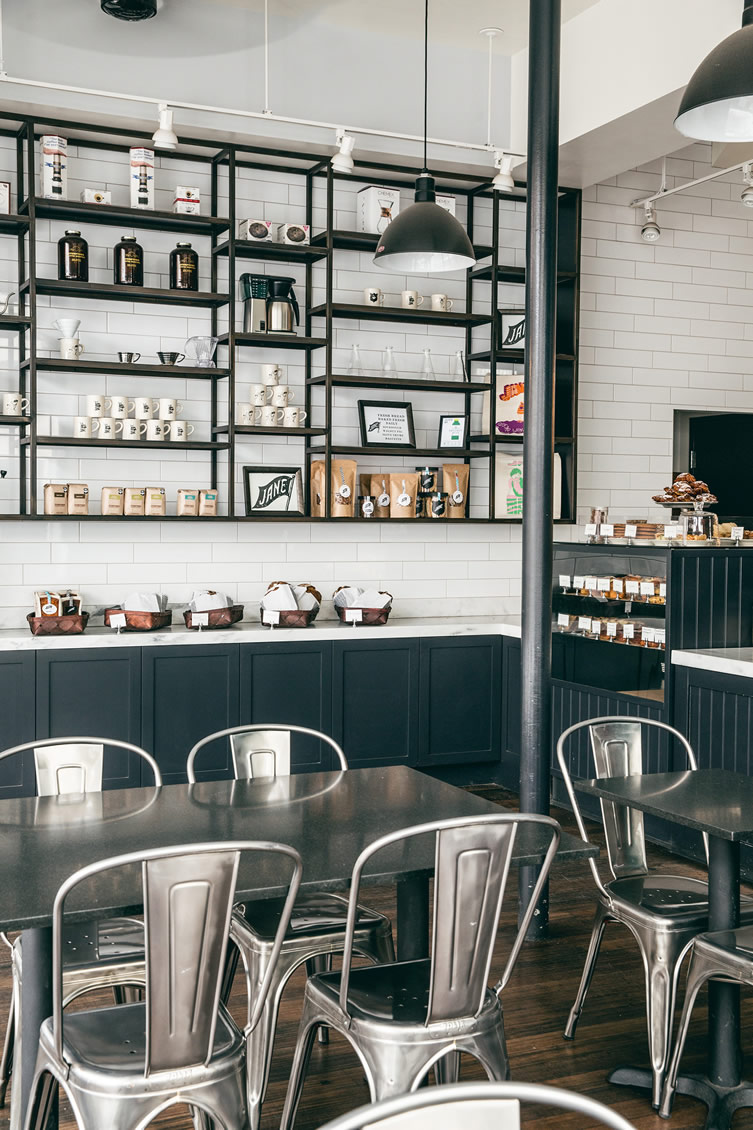
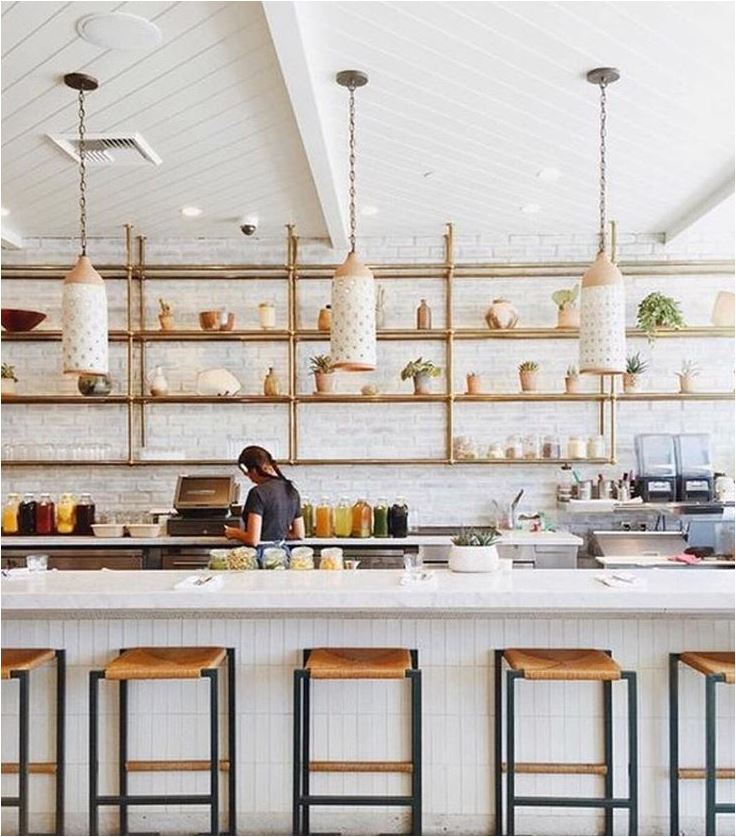
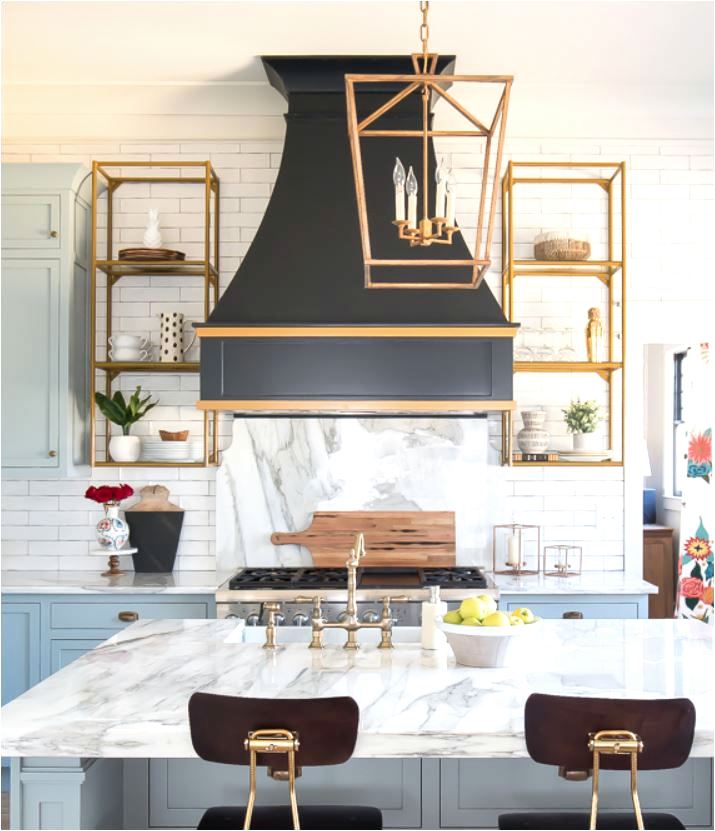
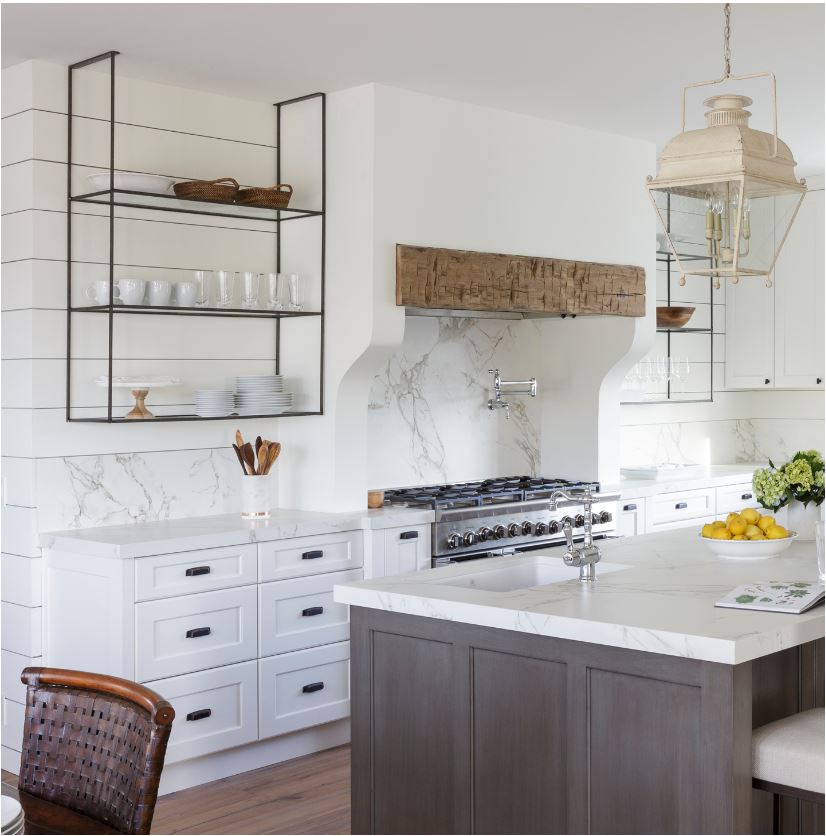
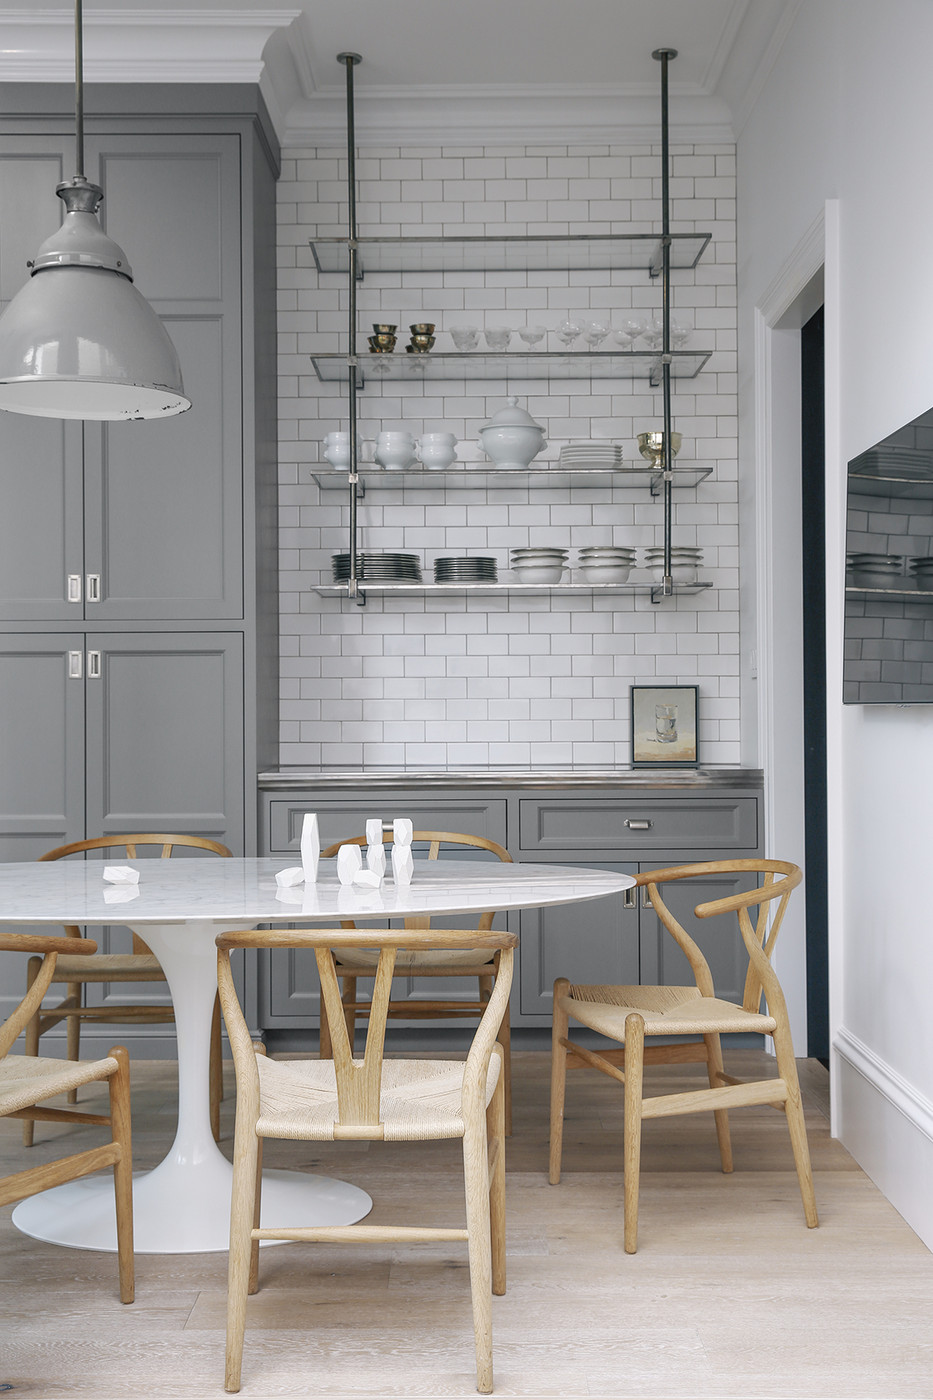
They keep popping up in my Instagram feed so I’ve come to the conclusion that suspended kitchen shelves are the new “it look” in kitchen design. This style of shelving is not attached to the wall like floating shelves, rather they are suspended from the ceiling and hang down from metal supports with glass or wood shelves added to provide open storage.
Open shelving has been popular in kitchens for long enough to say it’s no longer a trend, the look is definitely here to stay. Floating shelves are still going strong and now the suspended shelf is on the rise. Suspended shelving is a far more contemporary look than traditional closed upper cabinetry. They can blend well with transitional kitchens as long as the remaining elements are classic. With trends, I’m a skeptic but with this one I have to say, I’m on board. When suspended shelving is floated above a peninsula or island, they’re a more clever storage solution compared to a bulky drop down cabinet because they don’t block the light or a view into the space. In a kitchen, hanging shelves carry the same challenges as floating shelves: the need to constantly clean them so they remain dust free, and to also style them so there’s no emptiness. The suspended shelf look suits the display of a modern cafe or coffee shop… san francisco cafe via we heart
… and now they’re showing up in residential kitchens. With any residential kitchen, practically is key, but everything depends on lifestyle. This kind of shelving works well for displaying lesser used platters or cookbooks or cake plates and offers an opportunity to layer decorative objects… or nothing at all? What are your thoughts on the suspended shelving trend? Do you see them as the same as open floating shelves, looking good but requiring a higher level of maintenance? Or do you see them as a headache to clean and style on a consistent basis? from https://centsationalstyle.com/2018/10/trending-suspended-kitchen-shelving/ Have you heard about Party Pieces new bright and colourful collection? The Party Animals theme is perfect for a celebration where the kids get to run wild! We are loving the bright turquoise background featuring a zebra, giraffe, tiger and monkey along with confetti, party hats and balloons. What’s more, we love planning a party where your party supplies get to work double time – here are 8 ways where your goodies get to be reused and repurposed.
1 – MASKED INVITATIONMake sure all your guests are dressed to impress with the fun Party Pieces Jungle Animal paper masks – by popping a zebra, tiger, giraffe or monkey mask in an envelope with the party details on the back. Guests can then arrive dressed as their favourite jungle animal and are ready for the rumble! 2 – BALLOON BUNCHESMake your own trending balloon garland by blowing up brightly coloured balloons of all varying sizes – no helium required. Tie these together with clear fishing line, the more haphazard the better. String over the party table or your doorway to welcome guests in. This then also works so well as a photo booth backdrop and for the ultimate jungle party, you will want to add in a few of the exciting Party Pieces foil animal balloons. Imagine zebras, tigers and toucans peeking out from the big bunches and they make ideal party favours too.
3 – IT’S YOUR BIRTHDAYIf you are planning a birthday celebration you will definitely want to say happy birthday with a burst of colour and fun with the Party Pieces Party Animals paper garland. It features cheeky monkeys and toucan illustrations with vibrant and colourful lettering. Simply hang this garland against your feature wall or above a doorway for the ultimate impact. We always like to display this on the birthday girl/boys bedroom door before and after the party, after all, who doesn’t love a birthday week/month. 4 – PRETTY POTTED POSIESCreate a colourful centrepiece on the party table with potted plants with fuchsia pink, sunny yellow and royal blue flowers – instead of cut flowers. Afterwards, plant the flowers in your garden to enjoy long after the party. And if you are really into repurposing opt for edible flowers or herbs, think pansies or basil.
5 – FUN WITH FLAGSPaper straws are not just for drinking, how about creating some mini decorative flags? Stick paper triangles to paper straws with glue and add gold spray painted animal figurines to the top. Pop these into table centrepieces or use as cupcake or cake toppers. Or these Jungle Pencils with toppers or Photo Booth Props do just the trick as well! 6 – HAT HACKNothing says it’s a party like a party hat – first, add these bright and colourful paper party hats to full up your table setting and when it’s time to sing Happy Birthday each of your guests can wear a different coloured headpiece. Each cone party hat features a fun and contrasting bobble on top and comes with elastic for easy wearing. We even trimmed a few to make mini ones to top the water bottles! On a side note, party hats also make great paper cones to serve up chips or popcorn.
7 – NAME THAT BABY ANIMALTo decorate the party table we added in some animal figurines, not only do they look super cute but during the party play a quick quiz by having guests “name the baby animal” of each one using the Jungle Magic slates instead of paper and pens. Later on, hide the animal figurines for a scavenger hunt and at the end of the party give them away as prizes or party favours or add to your child’s toy collection as a birthday gift. P.S. I love using the animals as present toppers for kids’ birthday gifts instead of bows and the slates instead of cards.
8 – BACKPACK The luxury Party Pieces Party Animal paper bags feature fun illustrations of jungle animals on a turquoise background and yellow handles. Instead of handing out these treat bags at the end of the day – use them as mini packs for a scavenger hunt – that way your ttake-home treats (Jungle animal toys, tattoos, stickers, stationery, puzzles, sweeties) serve as gaming fun too. Or check out these Jungle Party boxes that little ones get to colour in at the party.
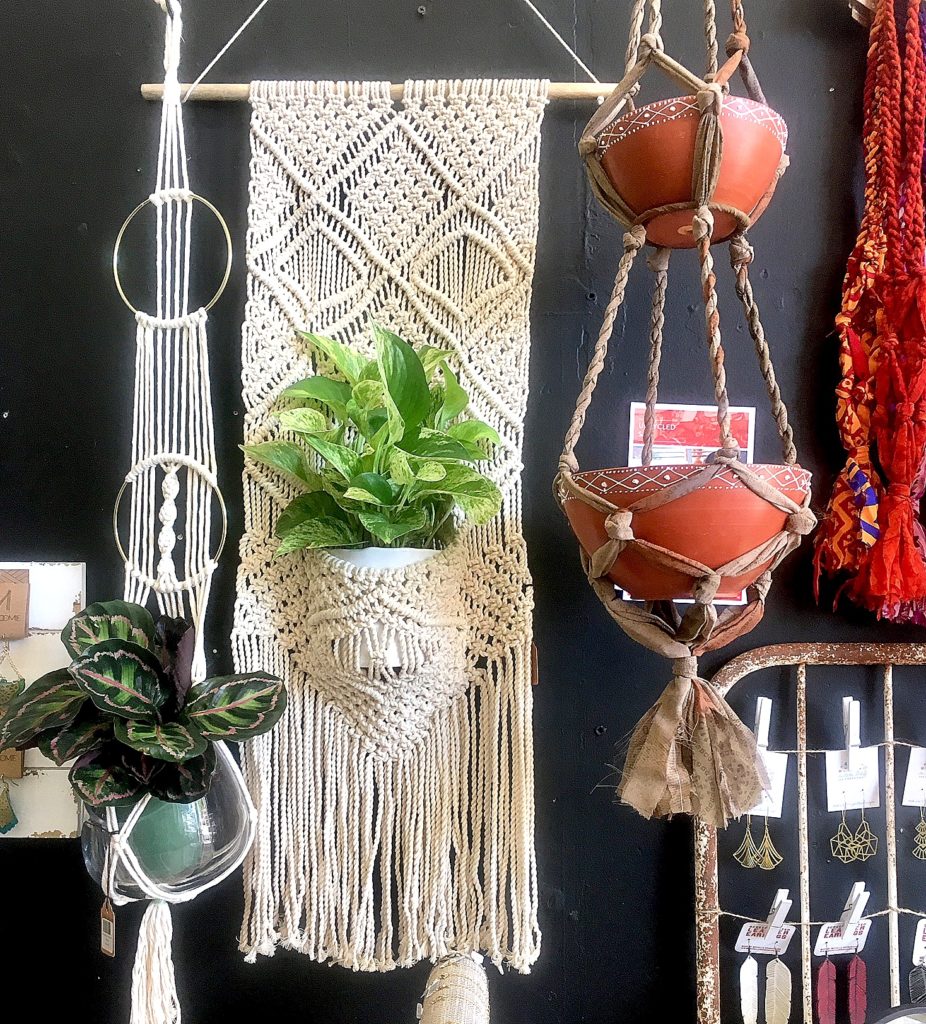
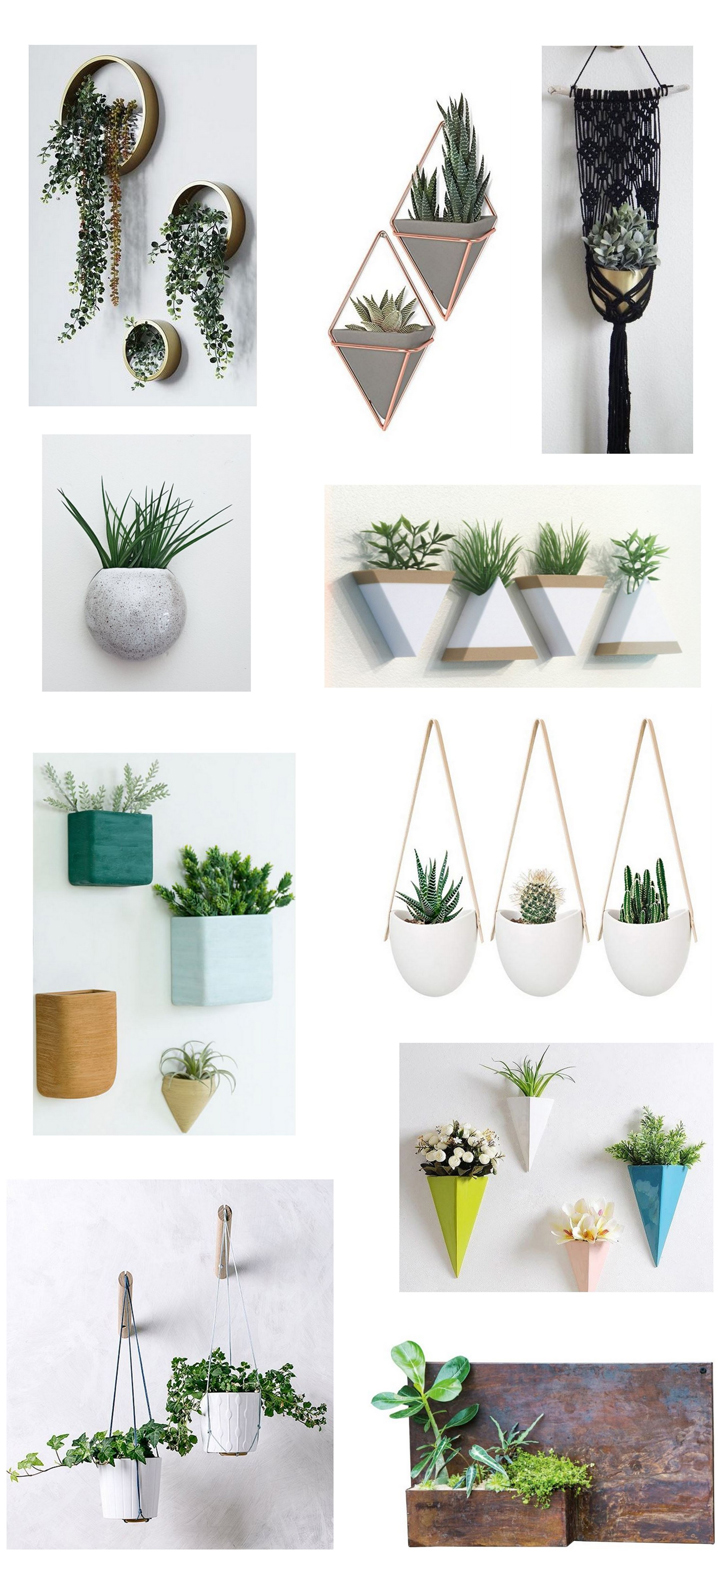
P.S. this party collection totally lends itself to different party themes, so don’t worry about having leftover party supplies – the goodies are well suited to a jungle, zoo or circus theme; and equally girls or boys of varying ages. The post Real Party: Rumble in the Jungle appeared first on Party Pieces Blog & Inspiration. from https://blog.partypieces.co.uk/real-parties/real-party-rumble-in-the-jungle/ Sunday I took a few hours off to stroll around my town’s downtown shops, one of them specializes in plants and eclectic planters, and every time I walk inside it’s pure zen. I have a lot of plants in pots around my house but have yet to hang them on the wall, and this cute macramé planter in my local shop got me thinking… I should!
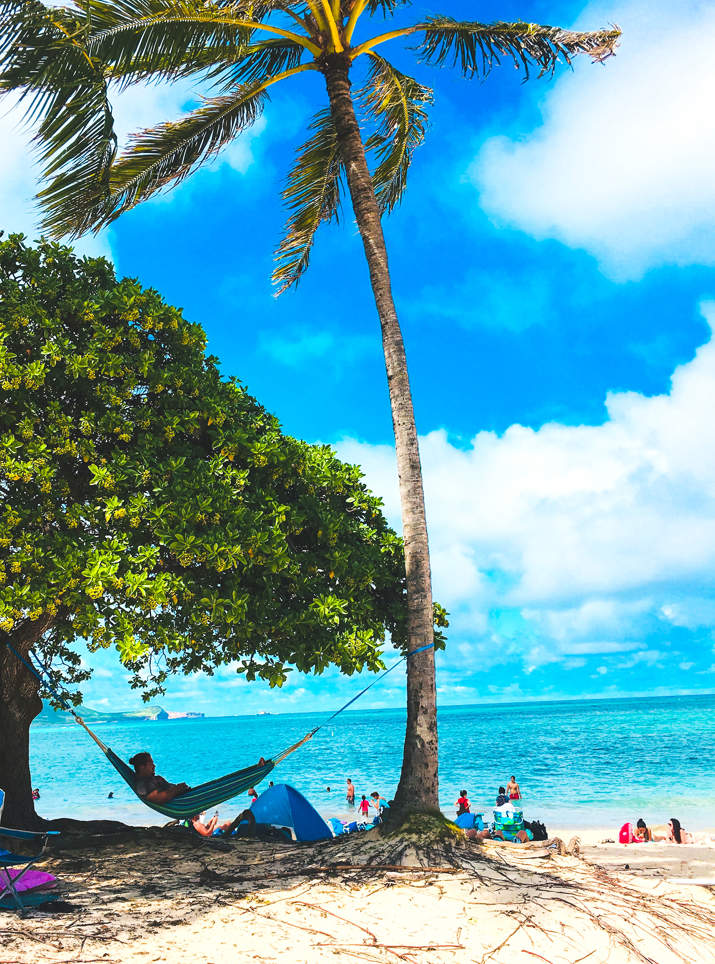
Macramé doesn’t feel right in my home so I don’t decorate with it, but macramé is still trending and it looks great wherever you want to introduce a bohemian vibe. I prefer contemporary wall planters especially ones in geometric shapes or creative textures. Wall planters are less effort than wall vases especially if you’re using air plants, or succulents, or mini cactus – they need very little water which translates to easier maintenance indoors. A few favorites for adding a little dose of greenery to your walls…. gold circles / umbra geometric / black macramé matte ceramic / hanging ceramic colorful triangles / hanging wall planter / vita metal . You might also like this roundup of hip house plants. . from https://centsationalstyle.com/2018/10/modern-wall-planters/ I had the fortune of a getaway to Oahu last week. It was an impulsive trip for therapeutic reasons, and I decided when I went I was going to spend as little as possible while still enjoying the beauty of the island. My focus was to feel the aloha and appreciate the magic of Hawaii without spending a lot of cash. To save money, the trick is really to think like a local and not a tourist. I spent three days in Kailua, two days on the north shore, and my final two days in Waikiki. Here’s how I saved money on my week long adventure in Oahu.
Fly Off Season + Pack Only a Carry OnOne of the biggest expenses, in addition to lodging, is actually getting there so the cheapest way to do it is to avoid summer and the holiday season and instead fly to Hawaii in the off season. I found a non-stop round trip ticket from San Francisco to Honolulu for less than $400 because I booked my trip for travel in October. Hawaii is in a tropical climate and the entire week I was there, it was still balmy and hot, and also much less crowded than it is in summertime. Also, save on those pesky $25 fees to check a bag each way by packing light! All you really need for a week long beach vacay are a few pairs of shorts, tank tops, a bathing suit, and flip flops, easy to pack in a carry on bag.
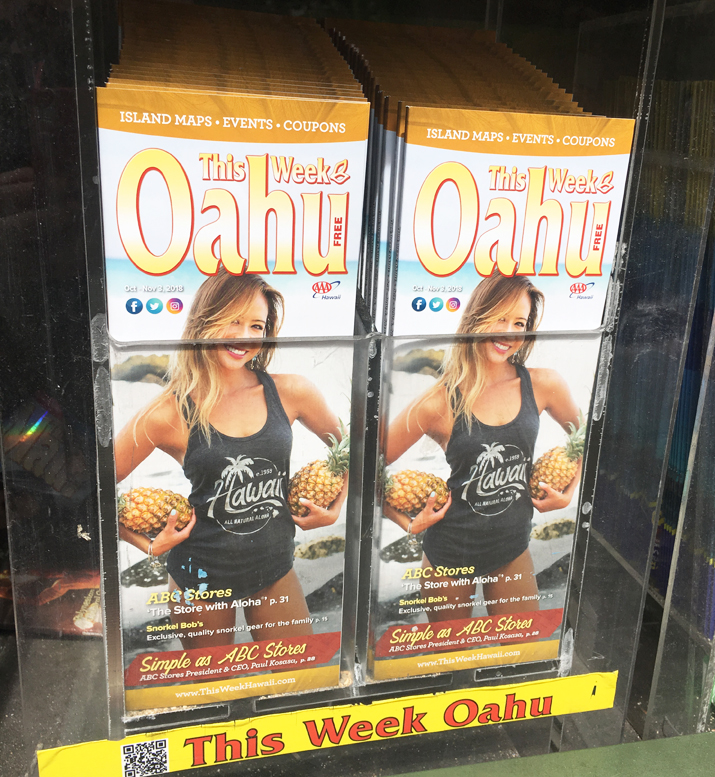
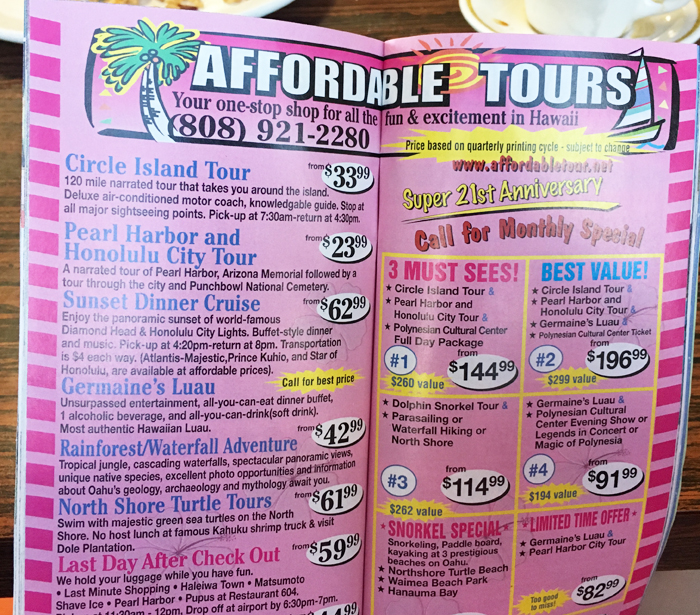
Read the Local GuidesEvery Hawaiian island has a “This Week” publication and it’s filled with a lot of helpful information and also coupons for discount activities, this is really helpful if you want to get an idea about what’s out there and compare prices on excursions, tours, luaus, etc.
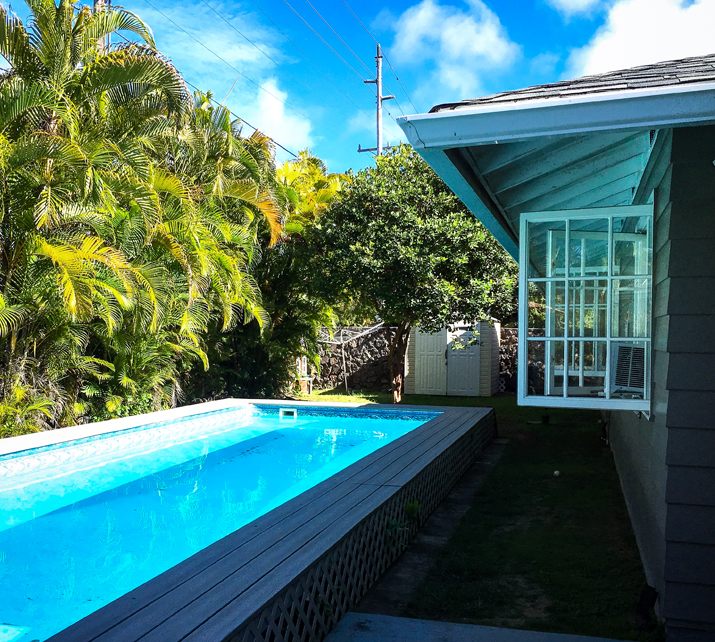
Skip the Pricey HotelsI’m an huge fan of staying with Airbnb hosts, and I did it twice on this trip. I rented a private room with a local family with my own bedroom and bathroom. I reasoned I’m only there to sleep and shower so it saved me a ton of money. I swam in their pool and played with their kids and sunbathed under their palm trees. I borrowed their beach chair and umbrella and beach towels when I went to the beach, I made new friends on the island and it was really great!
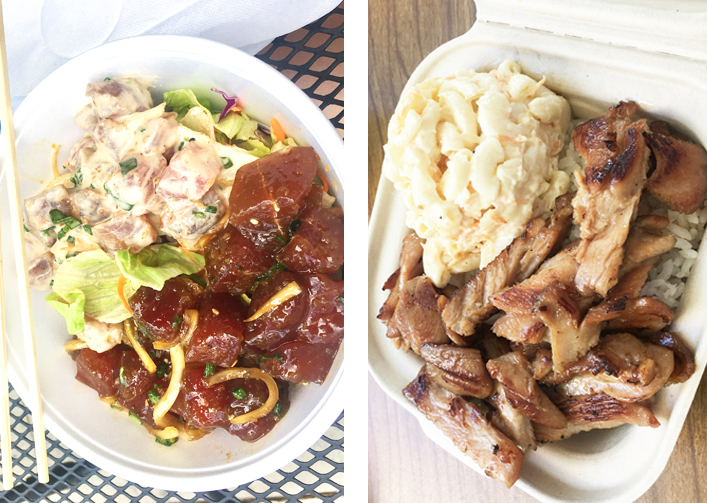
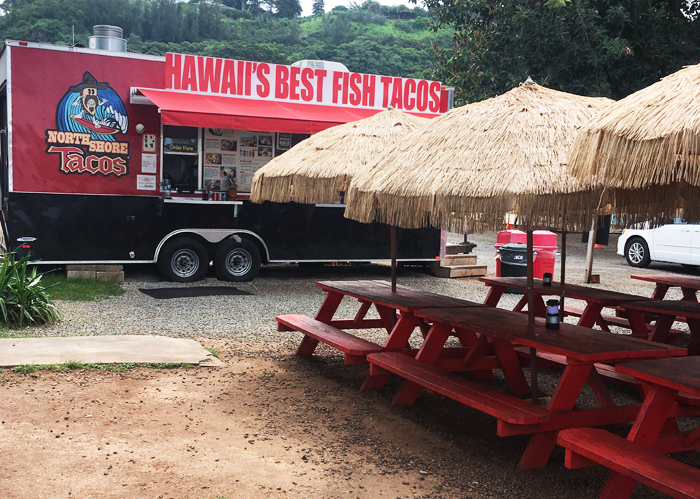
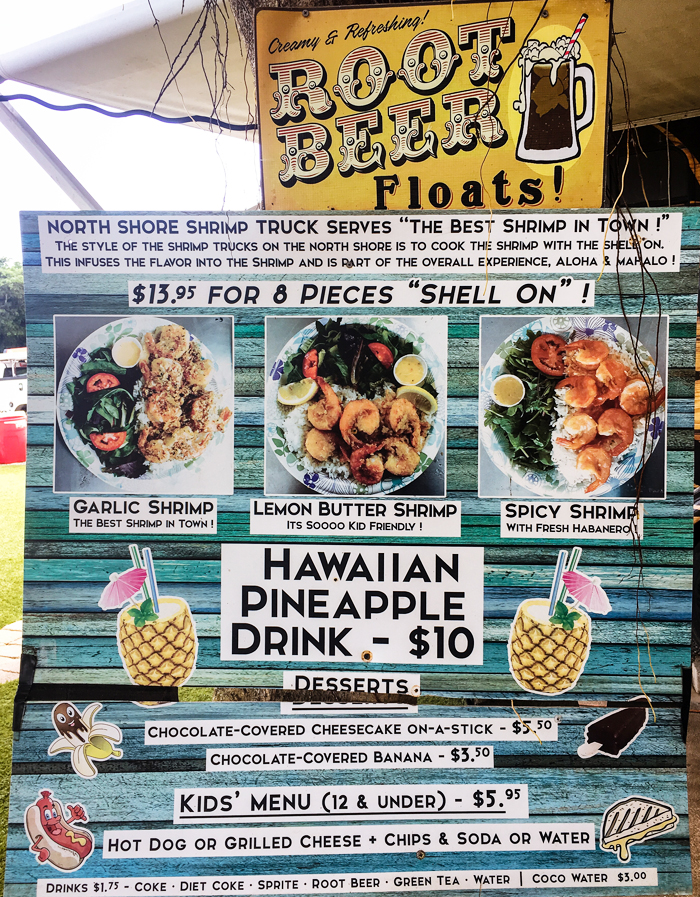
Eat Like a LocalIf you can rent a room with a mini fridge that’s the best, then you can stock up on a little fruit and some water (or adult beverages) at the grocery store. I found fresh poke at the grocery stores, and inexpensive plate lunches at the shopping centers, all based on recommendations by locals or search engine tips. Also look for food trucks! They offer a great selection of fresh seafood and tasty tacos.
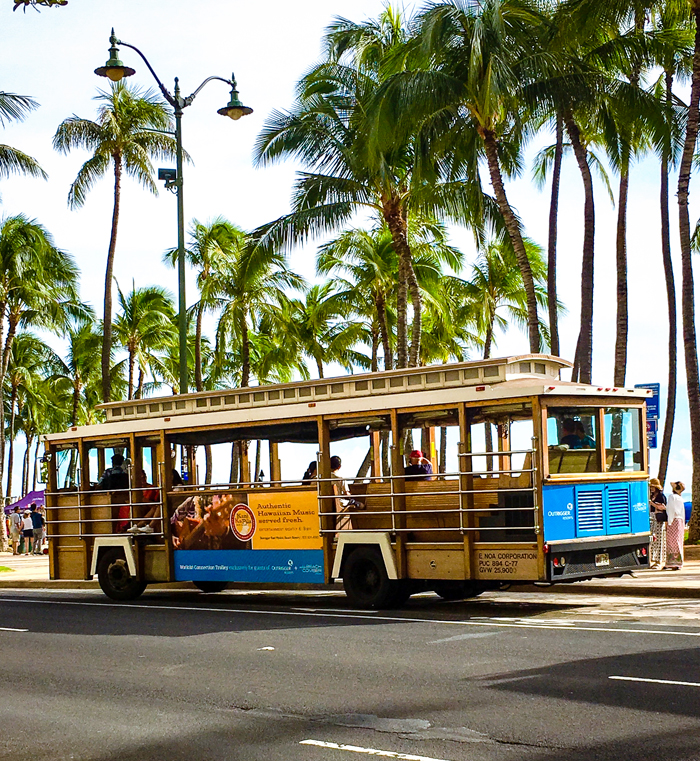
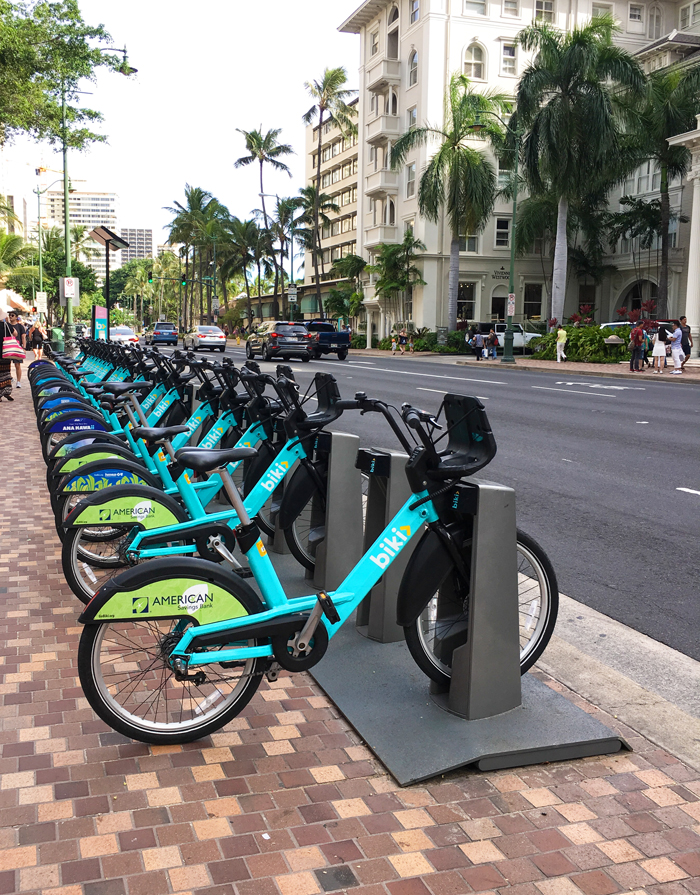
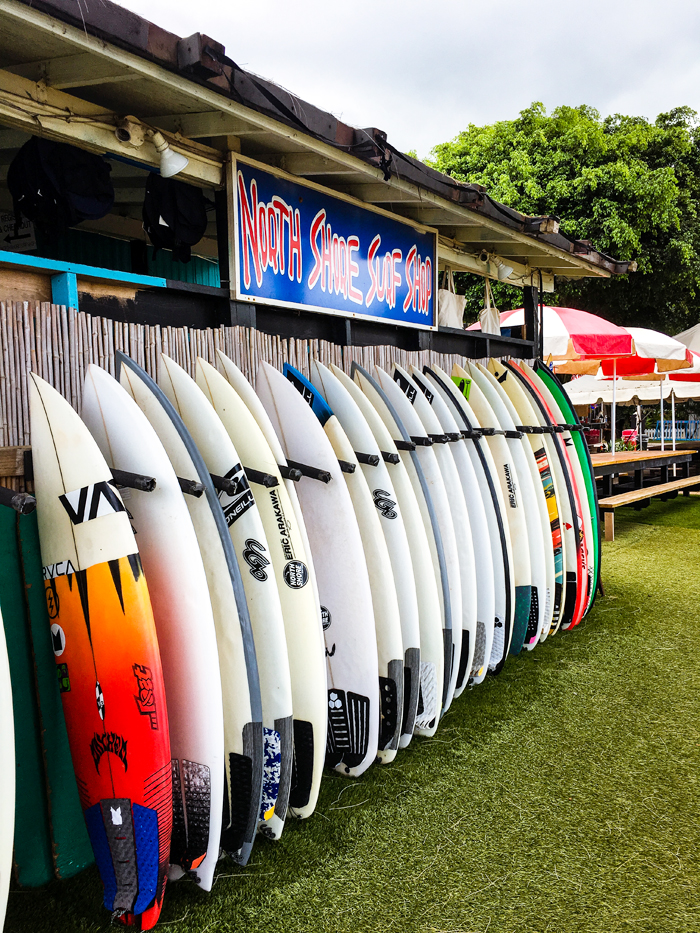
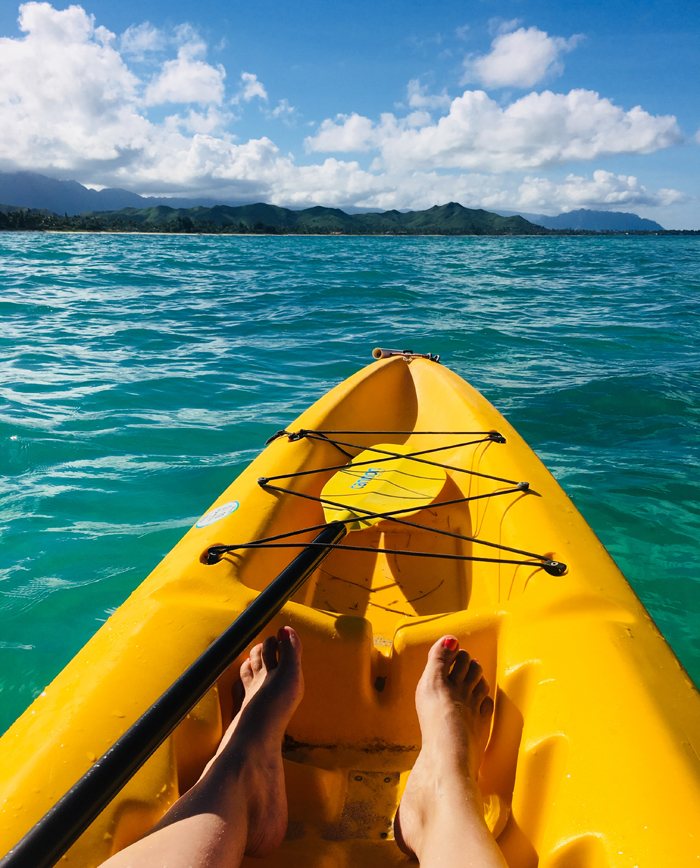
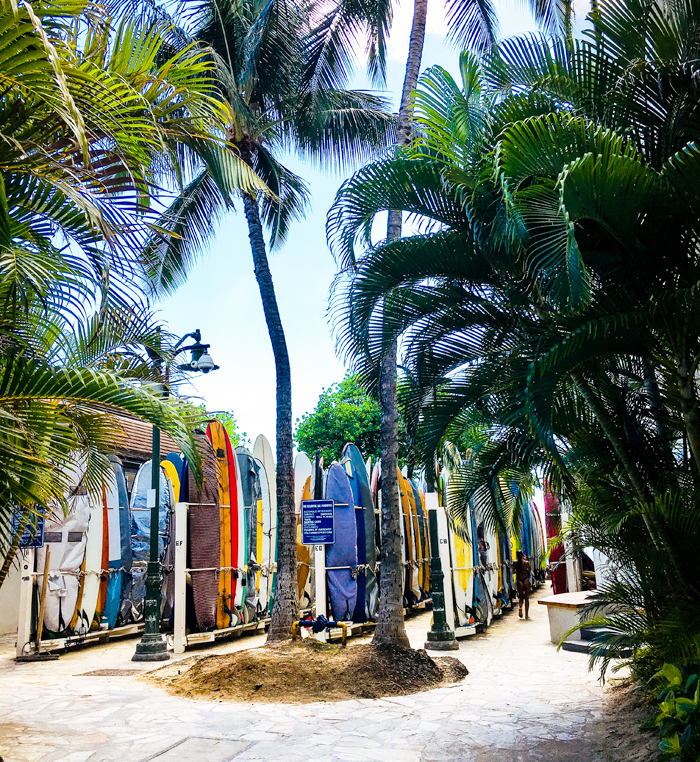
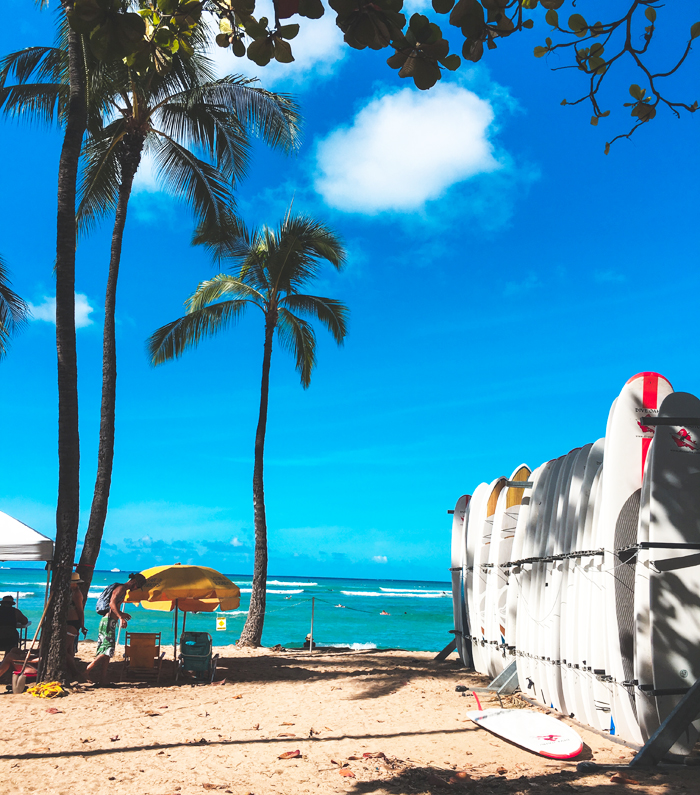
Opt for Public TransportationI love to walk so I never needed any transportation while staying in Waikiki on my last two days since it’s pretty condensed, but to explore the island you have two options, get a cheap rental car or take The Bus which goes all over the island. For my first 5 days in Kailua and the north shore, I rented a car for $20 a day but returned it when I got to Waikiki. Most hotels charge hefty parking fees, so I recommend you skip the rental car in Waikiki and rent a bike or scooter, or get a trolley pass or just walk! DIY ActivitiesSkip expensive tour guides and lessons and get out on the water on your own. Find a safe beach or cove with a lifeguard and outdoor showers and bathrooms. Rent a surfboard or SUP or kayak from the local surf shack, then get out on the water by yourself!
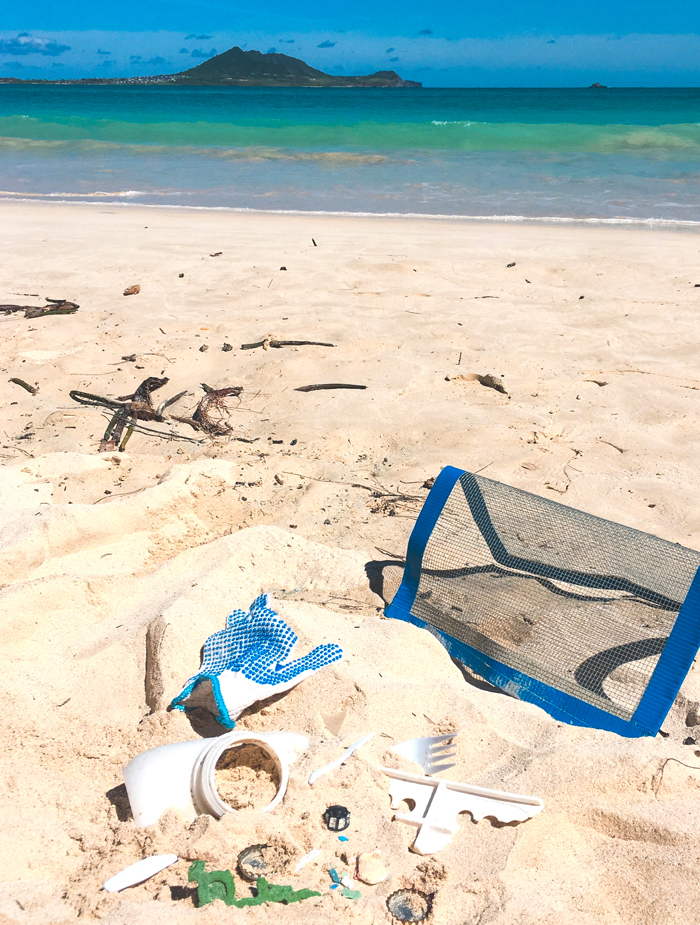
One non-profit I wanted to mention that helped me save money was Travel2Change, this exists on all the Hawaiian islands. One morning I volunteered to clean up microplastic on the beach in exchange for discount snorkel gear and a kayak. I also got to spend two hours with an Outrigger Canoe team in Waikiki for free by booking it through that organization. Definitely check it out!
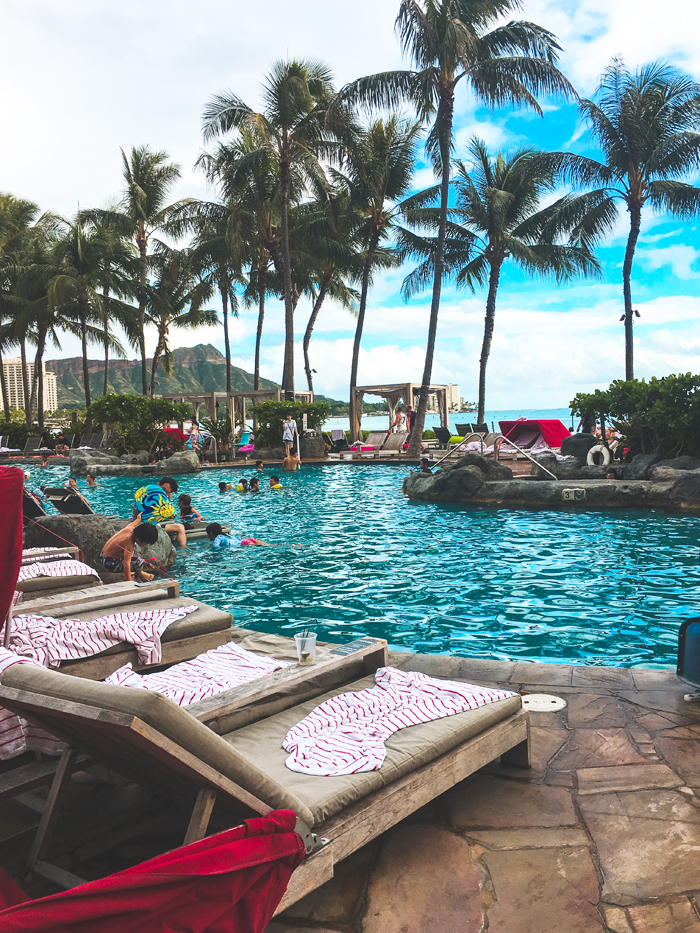
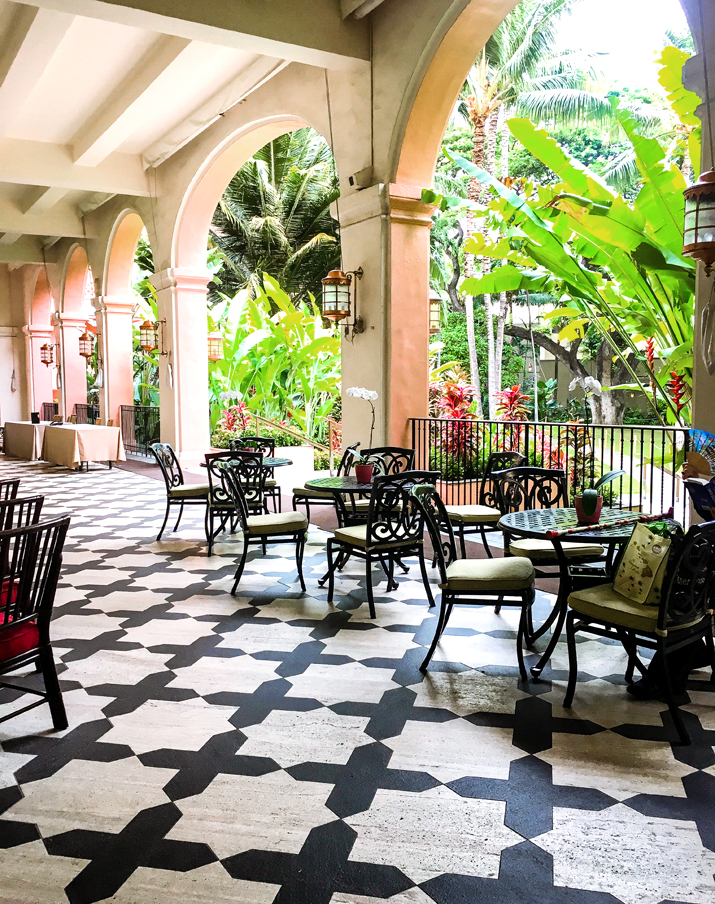
Stroll Around the ResortsI’ve stayed in fancy resorts before, but they’re really expensive so on this trip I just went exploring the hotels on foot. The lobbies and grounds of the resorts along the beaches are open to the public so I stalk them all and check out the decor and stroll through the pools and the gardens. Most of the resorts have public beach access so you can walk around them then head out to the beach.
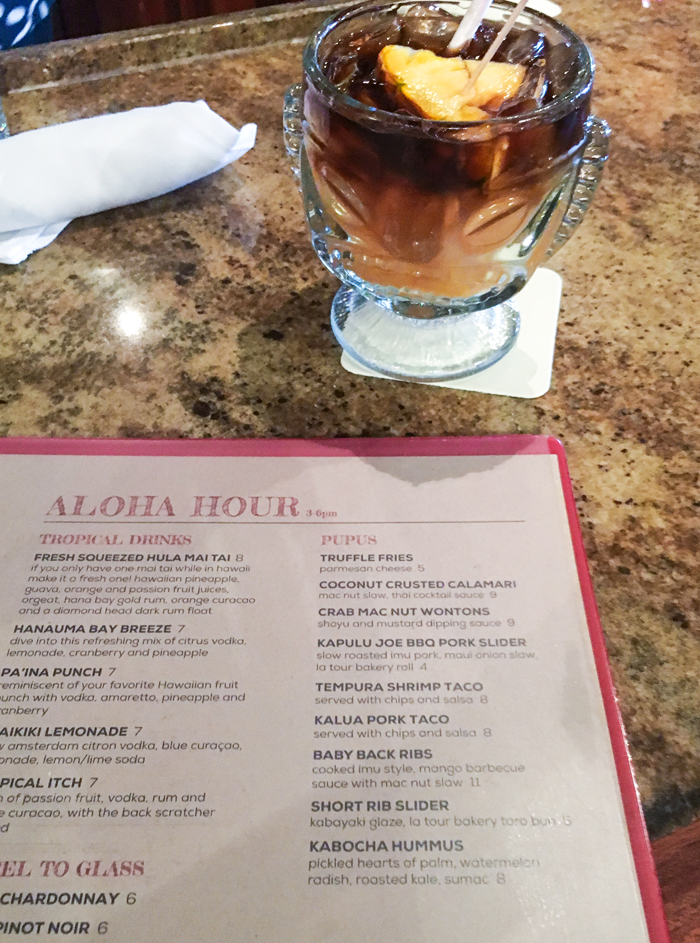
If a resort has a particularly cool vibe or view or drink special, one thing I’ll do is splurge on cocktail at the bar and pretend for a moment I’m a guest there when I’m not. :)
But when it comes to adult beverages, they add up quickly when you’re on vacay so….
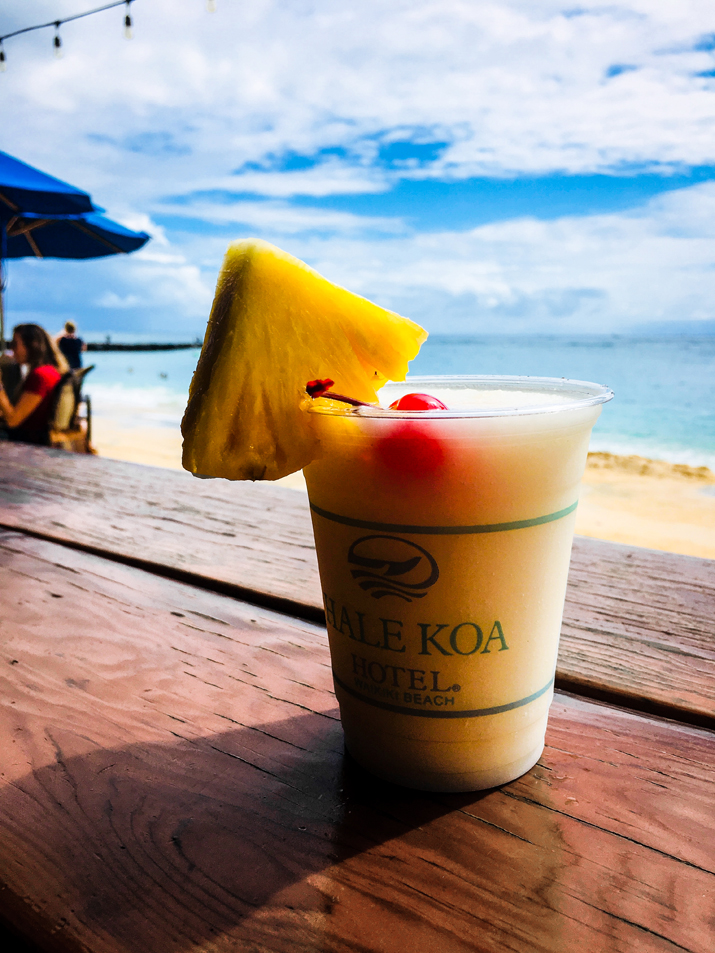
Take Advantage of Happy HourAnother great way to save money in Oahu is to search out the happy hour menus for less expensive appetizers and food. I loved Uahi Grill in Kailua for mai tais and sashimi, and the Hula Grill (above the famous Duke’s) in Waikiki for mai tais and tacos.
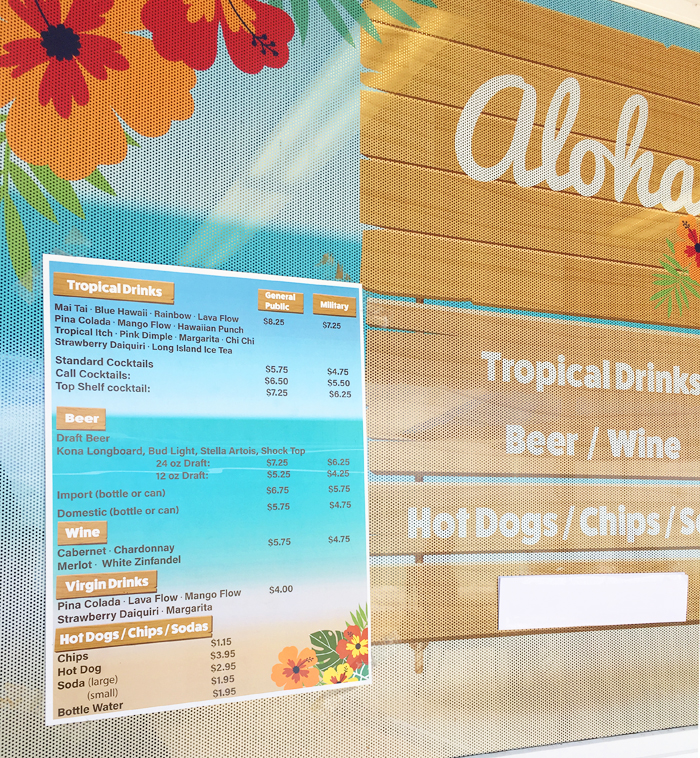
If you’re hanging out on Waikiki Beach there’s a beach front drink stand called Koa Oasis for less expensive beers and cocktails, and includes a military discount.
And of course you can always grab a cheap cooler and some adult beverages at the local market and then just camp on the grass or sand to soak up the sun.
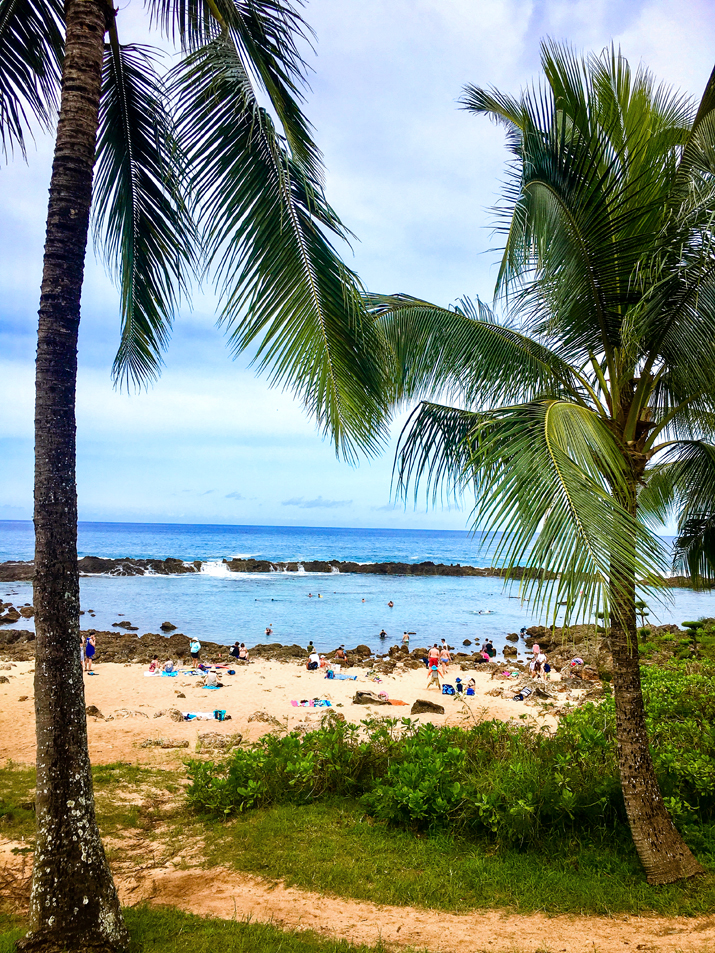
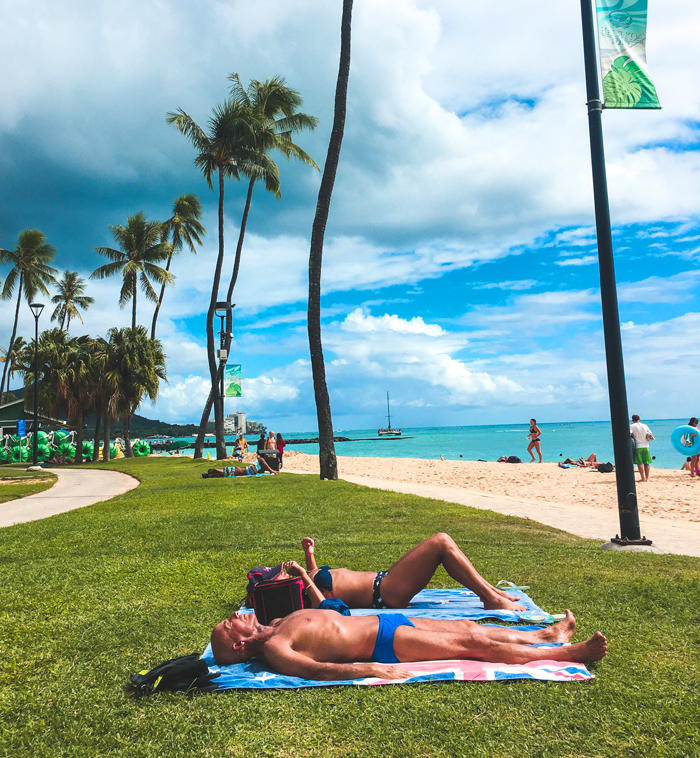
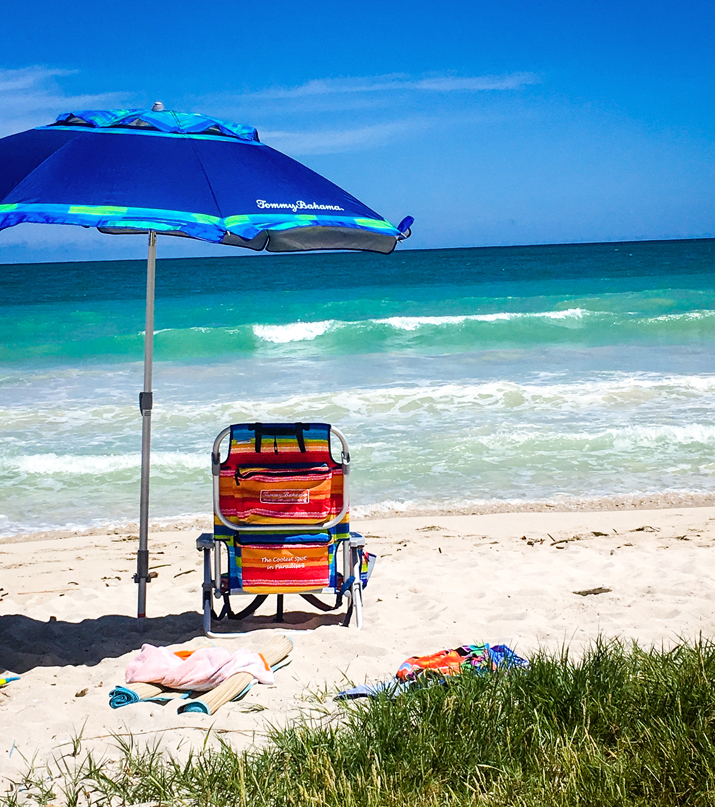
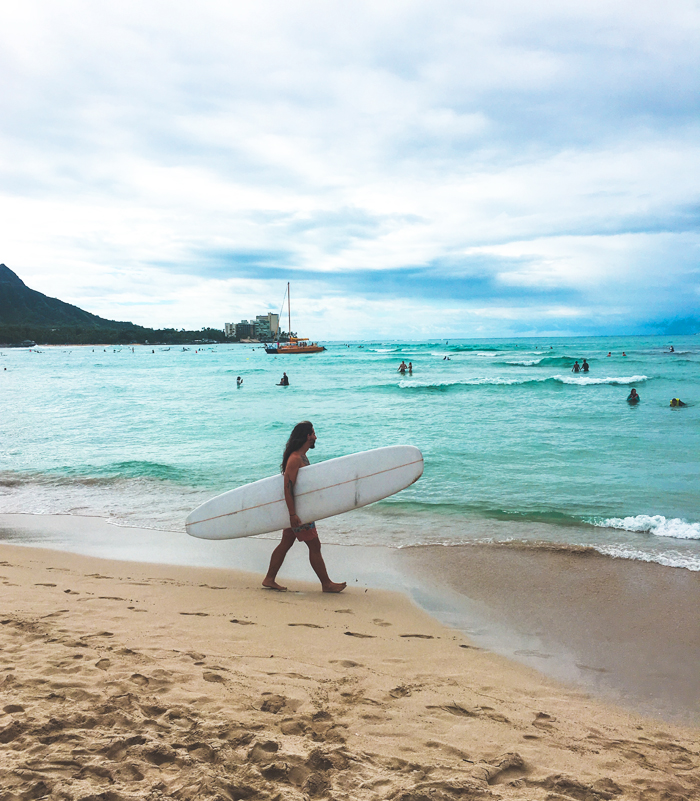
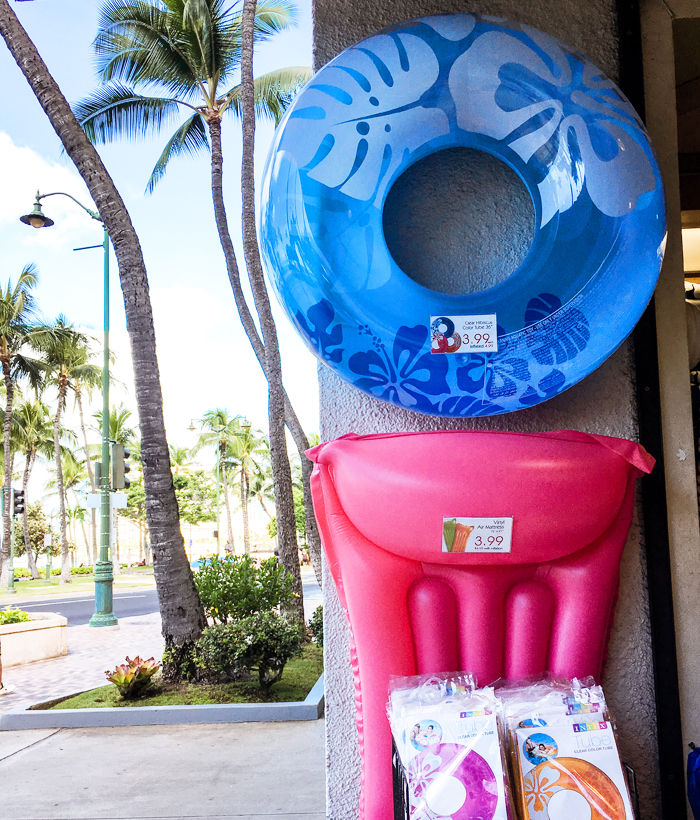
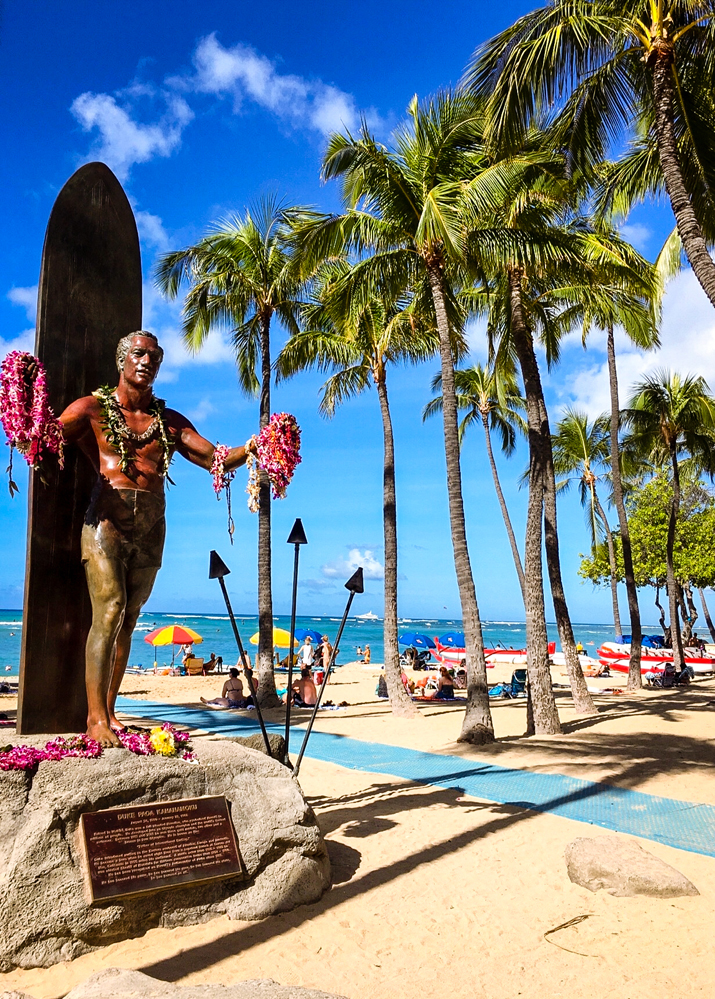
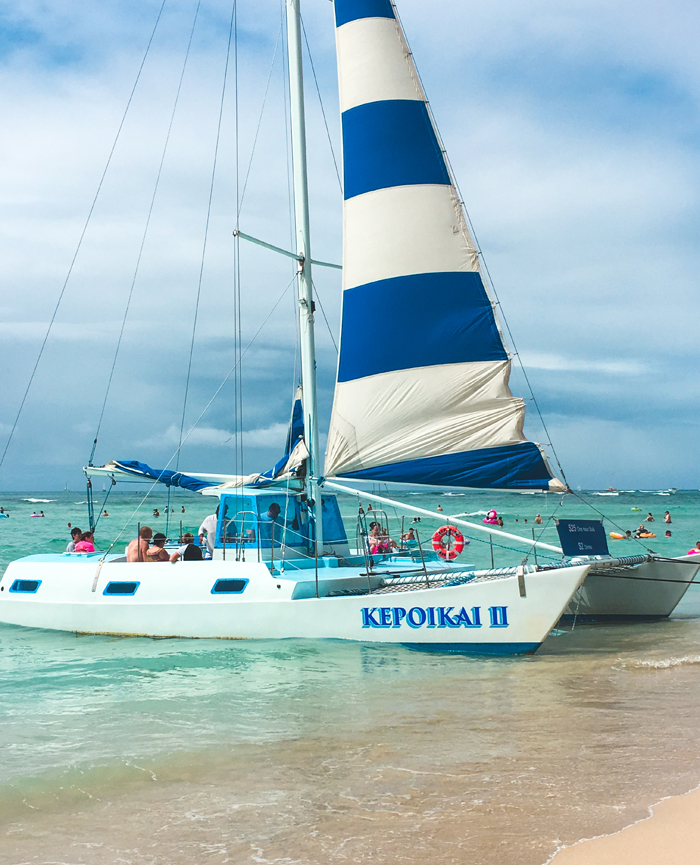
Become a Beach BumA primary reason anyone travels to Hawaii is for the beaches so embrace the beach bum life! All you need is your swimsuit and towel, rent a beach chair and umbrella for the day, pack a cooler of sandwiches and beverages and have fun in the sun. You can’t beat the people watching: cute little kids, locals walking their dogs, and all different kinds of people playing in the waves. Like the other Hawaiian islands, Oahu has so many public beaches where couples and families all hang out for hours with a picnic and their beach toys, I’m always entertained by the surfers! In Waikiki, there were a lot of beach stands and a few stores across from the beach where you could purchase an inexpensive float for the day for just a few bucks and go float in the turquoise waves!
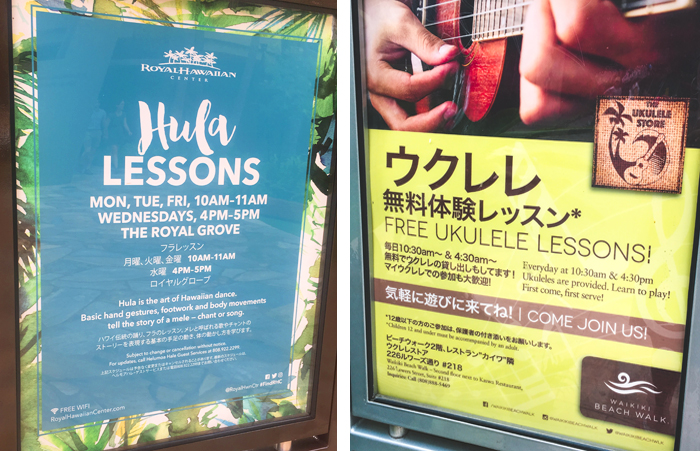
Embrace Hawaiian TraditionsIn different parts of the island you can find free hula lessons or ukulele lessons and see free hula shows – the This Week guide mentioned above has a lot of that information and it’s also advertised around so keep your eyes open!
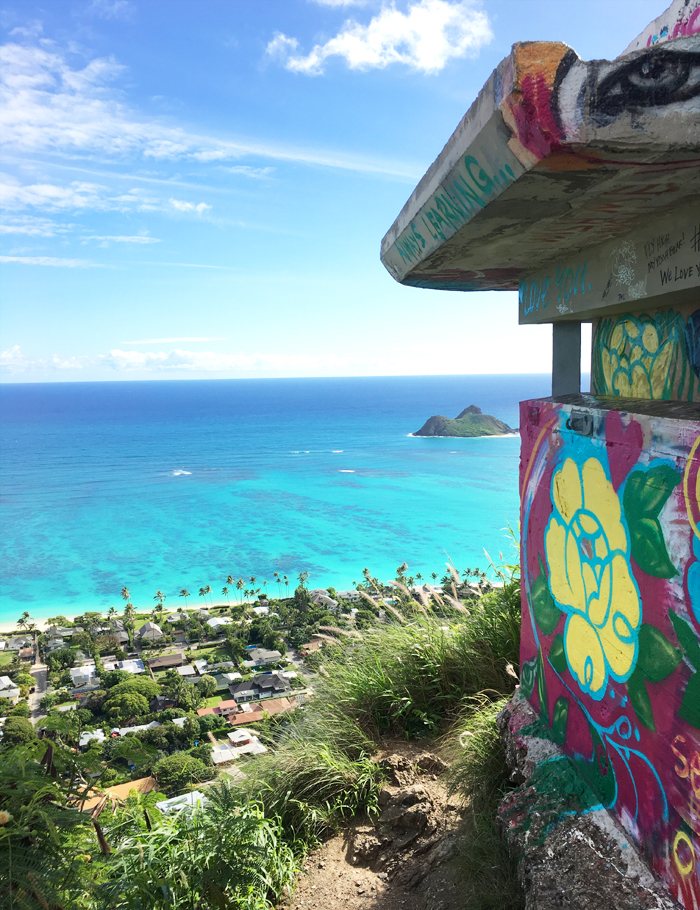
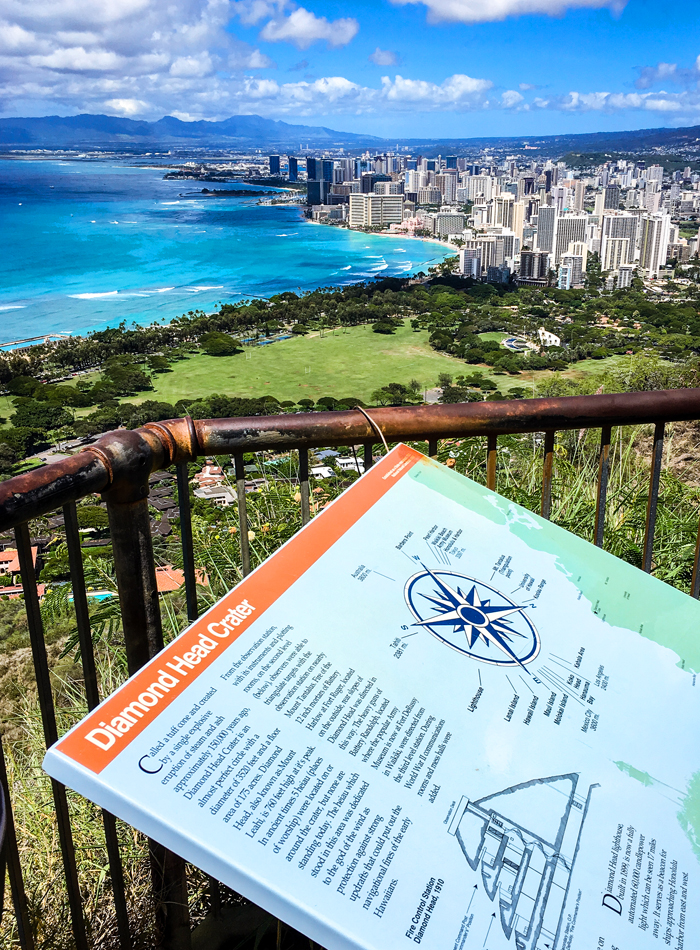
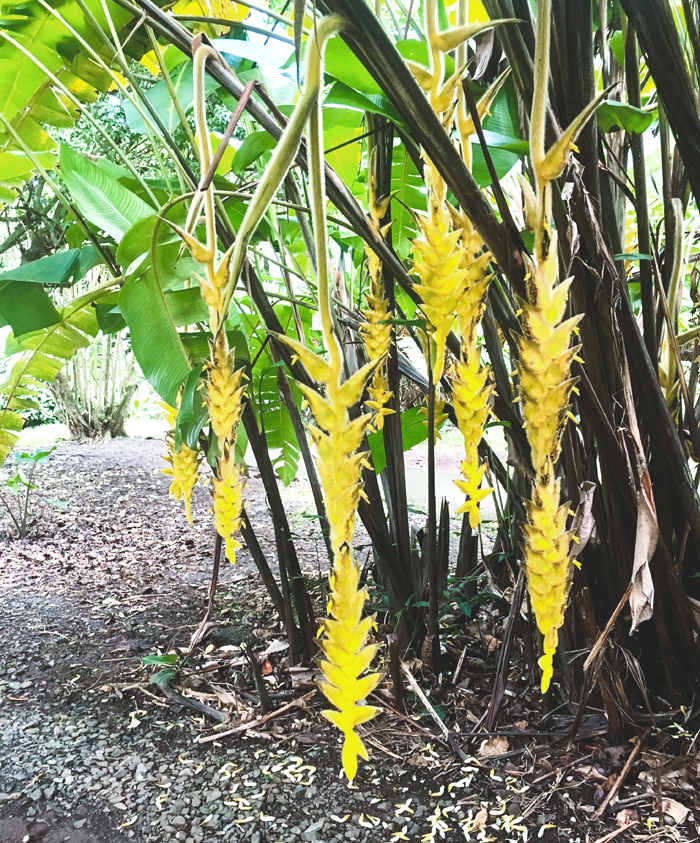
Explore the Natural BeautyHikes and botanical gardens are free (or sometimes there’s a nominal fee for entry) so make the jungles and the mountain tops part of your experience! In Kailua, I did the Pillbox Hike for 360 degree views of Oahu and in Waikiki I hiked all the way to the top of Diamond Head. All that exercise led to amazing views! I also visited the Ho’omaluhia Botanical Garden and saw some really stunning botanicals, highly recommended!
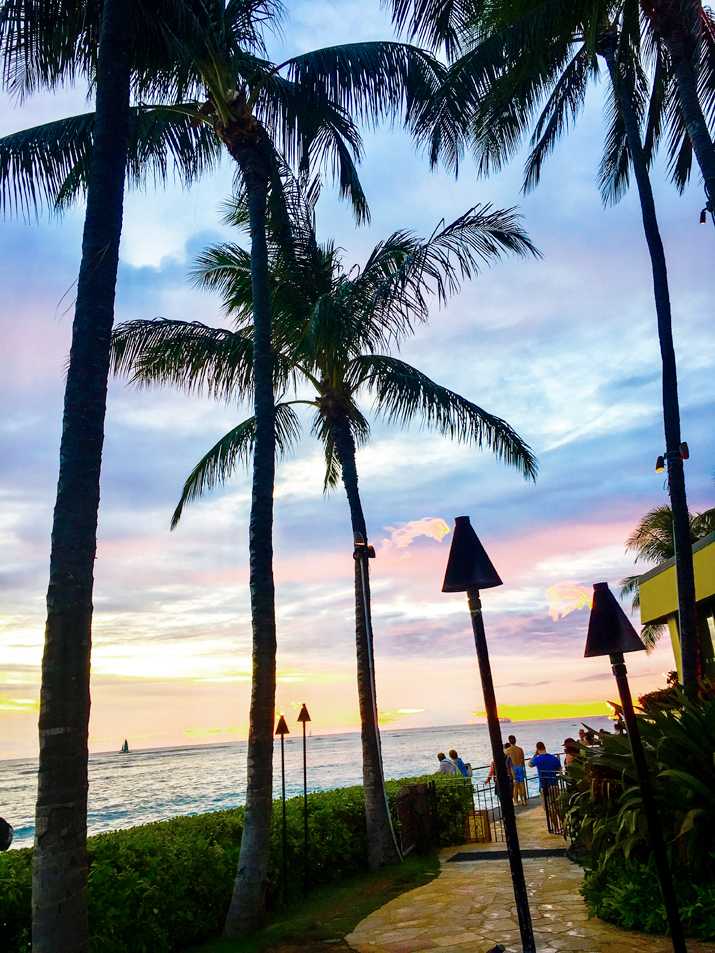
Sunsets are Free!The iconic Hawaiian sunset is alone worth the trip, right? If you’re on a beach with a western view they’re for you to enjoy in the evening!
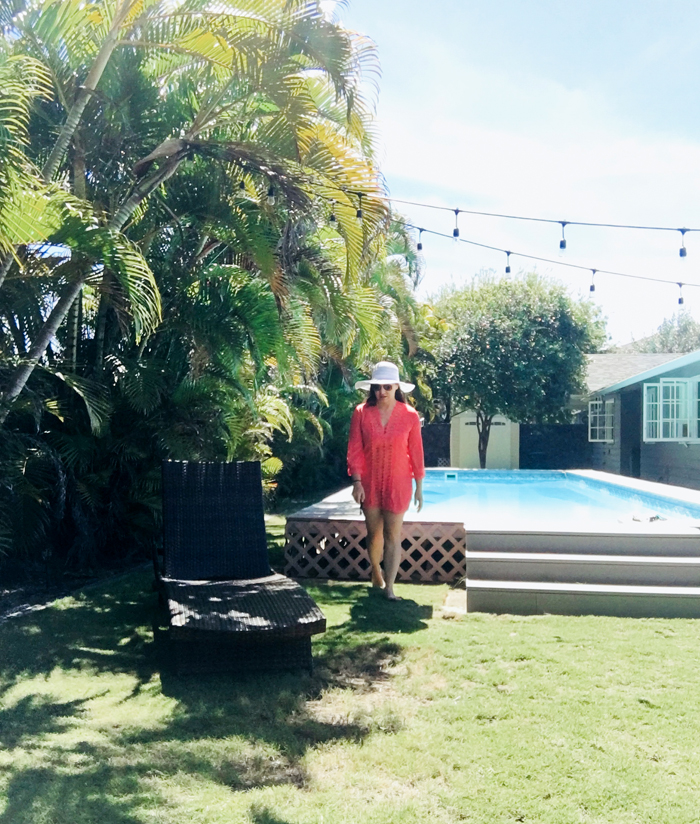
Just a few more of my images to show off the beauty of Oahu…. Many of these money saving tips apply to the other islands — Maui, Kauai, and the Big Island too. Friends who live in Hawaii, what did I miss? What are some of the local tips you can share to make visiting Hawaii affordable? . from https://centsationalstyle.com/2018/10/oahu-on-the-cheap/ |

About MeHi I am Albin Adamski from Brynrefail, I am 32 years old. I always surf web for buying antiques for home decoration. Archives
April 2019
Categories |


 RSS Feed
